Search for:

learn to check extender ip address after setup

You can login into your Netgear router through routerloigin.net or through it’s assigned IP address to check extender IP address. You need to type routerlogin.net or its static IP address in the URL or address bar and after that type the login credentials like username and password. Once into the dashboard screen then follow the instructions given here to retrieve your extender’s IP address-

  • On the left-hand side of your Netgear router dashboard, you will see an option “Attached devices”.
  • Click on the attached devices and it will show you all the devices connected to the router.
  • In the attached devices options you will see IP address, MAC address, and device name.
  • So look for the extender model number in the device name and note the IP address mentioned in front of the extender model number.
  • You need to type that IP address in the address bar to login to your extender.
  • In case you don’t have an extender under device name then you can try each IP address manually in the URL and one of them will be your extender.
  • Make sure when you try the IP address of the extender, it should be working and plugged into the wall.

NOTE:- You can also cross-check the IP address of the extender in case you have a Netgear router with the help of the Netgear genie APP. Install it and under the attached devices section it will show you the device names and the IP address. Type the extender’s IP like 192.168.1.250 in the URL of your browser to login into the extender.

Setup wireless N Wifi Repeater using 192.168.10.1

how to setup the wavlink wifi extender via the wps button

WPS method is the easiest way to setup the wavlink wifi extender with any device which supports Wi-fi Protected Setup. WPS button is available physically on the router and also on the Setting page of the Router. Follow the steps below to connect your Wavlink N300 Setup, Wavlink AC750 Setup, Wavlink AC1200 Setup, wavlink AC2100 setup and all other models using the method.

  1. Place your extender to the router wifi range.
  2. Plug the extender to a power outlet and wait for the extender to boot up.
  3. Locate the WPS button on the router which is physically located on the router. Press and hold it for 3 sec.
  4. Now press the WPS button on your wavlink wifi extender within 2 minutes after initiating the WPS from the router.
  5. Once the WPS light turns to solid green. It indicates a successful connection to the router.
  6. Find the _ext wifi on your wifi list and connect any device using your Existing regular wifi password.

If you want to access the Setup page using the web you need to type ap.setup in the URL. To setup the Wavlink wifi extender using the browser click here

Setek Extender Setup

how to setup setek wifi range extender

SETEK Extender Description

SETEK Extender Setup is super easy and provides an ultra-fast connection in your homes, offices or business places. It tremendously increases the Internet speed in your dead zones. You just need to press and hold WPS on your configured/working router and repeat the same process on your SETEK ultra wifi range extender. This SETEK extender is equipped with 4 high-speed antennas which makes sure you get 300mbps of speed to seamlessly surf the Internet. Now you can easily connect your smart tv, gaming console, firestick etc with an ethernet cable to this SETEK ultra extender. It is designed to fit any interior and connect with any device you have like windows, Mac, iOS, android, security camera, Roku, etc.

Setup SETEK Wifi Extender Setup via WPS

  1. Plug your Extender in the same room as your router, this will help for faster connection through WPS.
  2. Wait until you have a solid green light on the extender.
  3. Now press and hold the WPS on the setek extender for around 2 seconds, repeat the same procedure on your router.
  4. Now you will see blinking WPS light both on your extender and router. It hardly takes 10-15 seconds for extender to get connected with the router.
  5. Once connected the WPS light on the setek ultra wifi range extender will turn to solid green.
  6. You can now unplug your extender and place it at the location where you need Internet Connectivity.

NOTE:- Place the Extender within the reach of the router.

  1. For better connectivity place setek away from big appliances like Ac, microwave ovens, etc.

How to Setup Setek WiFi Range Extender via 192.168.10.1

  1. You can plug extender near or even away from the router while doing web-based setup through 192.168.10.1.
  2. Once you have a solid green light on the power you can go ahead for the Setup.
  3. Grab any of your wireless device like i-phone, Mac, laptop etc any open settings and go to WiFi settings.
  4. In your WiFi list, you will find your Setek Wireless Network showing up as “WIRELESS N” Network92
  5. Hit the and get connect to WIRELESS N, it will show as open/unsecured network.
  6. After this open a browser on the same device and in the address bar type 192.168.10.1 which will take you to setek extender setup.
    NOTE:- If 192.168.10.1 doesn’t work try resetting the extender or change the browser or else try using different cellphone or computer.
  7. Follow the on-screen instructions and then it will scan the networks.
  8. It will show you all the available networks, you will have to select the main WiFi Network that you want to extend.
  9. Type in the password for the network that you have selected.
  10. Once Setek extender setup is complete the WiFi light on the extender will turn solid green.
  11. Now you can unplug it and place it within the reach of your router.
  12. It takes around 60 seconds for the extender to boot up properly.
  13. For better Internet connectivity place the extender away from big appliances like microwave etc.
Dodocool dc39 extender setup

how to setup new dodocool extender dc39

Dodocool is a wi-fi network extender. So what it obvious Is that what is wi-fi network extender and why we need this? Wi-fi extender can help us to use our devices where the range is not reachable in our homes or offices. Sometimes, home Router coverage isn’t just enough to bring a strong and consistent wireless signal throughout homes. So to ease this, devices like Dodocool’ DC39 wall-mounted wireless range extender incredibly useful. It can reach even the farthest parts of homes. It has a transmission rate of 300mbps and 2.4 GHz wireless connection via wireless N(802.11n ) and can work up to a distance of 100 meters. Dual integrated antennas ensure better wireless performance and stability. Dodocool dc39 extender setup can be done in different ways:-

 “Dc39 setup” via ap.setup | 192.168.10.1

  1. Plugin your extender directly into electric socket green light will blink on it, which indicates DC39 extender is ready for setup.
  2. Now go to your computer/mobile, and click on WiFi and connect to the “Wireless-N” network. This is the default dodocool extender network name.
  3. Open up chrome type IP address 192.168.10.1 or simply type ap.setup in the address bar.
  4. It will open a dc39 extender setup page, type “admin” for both username and password.
  5. Scanning will start on your screen where you will see the network list
  6. Select your main wi-fi network among the list and type the password.
  7. It will take about 50 seconds to apply your settings and will reboot after that.
  8. You are able to connect the internet. The extender will come as your HOME-NETWORK_ext.
dodocool dc39 extender setup

 “Dodocool extender setup” via WPS setup:-

  1. You need to Plugin the extender to an electric outlet.
  2. It should be within the same room as your router
  3. Greenlight will blink which indicates Dodocool dc39 extender setup can be started.
  4. Make sure you choose the right switch on your dc39 extender from router mode, signal repeater/range extender mode.
  5. Now push the WPS on your router and within 2 minutes push the WPS button on the extender. On dodocool WPS button is present on the side of the extender.
  6. You will find both the WPS light on the extender and router blinking. And once configured the Wi-Fi light will turn solid on the dc39.
  7. Now you can move this extender to the wi-fi deficient area and connect your devices.

d link dap 1320 extender setup

Having trouble connecting your Wi-Fi at home? Now getting Wi-Fi signals because you have a wall between you and your router? Well, say goodbye to dead zones and buffering videos! This is the age of super-fast internet speeds and interruption-free media consumption. The D-Link DAP-1320 extender is a class product that offers some amazing features along with extending your Wi-Fi. Being so compact and affordable this extender is ideal to push limits and increase the Wi-Fi connectivity range of your main Wi-Fi signal to your basement, backyard, and other regions having a lot of walls and obstructions to the signals. It delivers speeds up to 300 MB/s covering an area of 150 square feet. Has dimensions of 6.28 x 4.75 x 2.95 inches. It weighs around 2.43 ounces. Here we will learn D-link dap 1320 setup

D-Link 1320 LED Indicators

  • Red – The extender is booting up and is getting ready for use.
  • Blinking Amber – The extender is not connected to a wireless router yet or has a very poor connection.
  • Blinking Green – WPS button has been pressed and it is trying to connect to the nearest Wi-Fi network.
  • Solid Green – The DAP-1320 extender has successfully connected to a WI-FI network and is ready for use.

Setup dap 1320 repeater via Browser

  • Plug the D-Link DAP-1320 to a power supply and it should blink a solid ‘red’ color on the LED indicator for a minute or two and then after some time it will start blinking in an orange color indicating it is ready to be setup.
  • In your computer or laptop, enable Wi-Fi and select the Wi-Fi network having the name (SSID) of ‘dlink-68BE’. The ‘SSID’ and its appropriate ‘Password’ will be given in the configuration note that is included in the box as a piece of paper.
  • Once you connect to the network, open the web browser in the same device and search ‘http://dlinkap/’
  • The first page opens up, click on ‘Next’. Select the ‘Manual’ option and click on ‘Next’.
  • It will search for Wi-Fi networks around it and once it does that you will be redirected to a page that contains the list of Wi-Fi networks around you. Select the Wi-Fi network that matches the SSID of your main Wi-Fi router having internet access.
  • Click on ‘Connect’ and on the next page enter the ‘Password’ of the same network and click on ‘Next’ to complete the setup.
  • On the next page, you will need to edit/modify the name (SSID) and password of the extender’s network that you will extend from now on. Click on ‘Next’ to continue.
  • You can now verify all the settings done. Once you’ve verified it, click on ‘Done’ and wait for a minute for the settings to be applied and the extender to reboot.
  • You can now reconnect to the extender’s (modified) SSID using the password that you created earlier.

Dap 1320 repeater setup via WPS

  • Plug the extender into a power source quite close to the main Wi-Fi router which you wish to extend.
  • Wait for the extender to boot up. The LED indicator will glow ‘red’ in color and then blink bright ‘orange’.
  • Press the ‘WPS’ button on the router (or) AP.
  • Now, press and hold the ‘WPS’ button present on the D-Link DAP-1320 on the left side for a couple of seconds until the LED starts blinking green. Then release the button. Once, the extender has connected to the Wi-Fi router, it will glow a ‘solid’ green color.
  • Move the DAP 1320 extender according to the signal that it receives from the router and how much you receive on your devices. Placing it halfway between the Wi-Fi router and your room will be ideal for stable and consistent internet speeds. Now the D link dap 1320 setup is complete.

Dap 1320 setup via Mobile App

  • Make sure your main Wi-Fi router and DAP-1320 extender is connected to a power source and is ready to use.
  • Install the QRS app on your smartphone to complete the setup.
  • o App Store: https://apps.apple.com/gb/app/qrs-mobile/id492593992
  • o Play Store:
  • https://play.google.com/store/apps/details?id=com.dlink.QRSmobile&hl=en_GB
  • Open the QRS app on your mobile device and click on ‘Start’ on the first page.
  • The app will automatically detect the operation mode of the device. So, click on ‘Next’.
  • It will now scan for any available Wi-Fi networks in the close range around it. Select the Wi-Fi network that you wish to extend and enter its password.
  • Click on ‘Next’. Now, enter an ‘SSID’ and ‘Password’ for the new network of your extender.
  • On the next page, you will have to enter an administrative ‘password’. Click on ‘Next’. Now you will be redirected to a page to verify the settings made. Once done, click on ‘Save’ to complete the setup and save changes.
  • It will take some time to reboot the extender and make changes.

Upgrading the Firmware of Dap 1320

  • Visit ‘https://support.dlink.com/ProductInfo.aspx?m=DAP-1320’ to download and save an offline version of your extender’s firmware on your computer to install it manually.
  • Make sure the D-Link DAP-1520 Wi-Fi range extender is connected to a power supply and is connected to the router and has an Internet connection.
  • Connect your computer, laptop, or mobile device to the DAP-1520 extender. Open the browser in the same device and enter ‘http://dlinkap.local’ in the address bar.
  • Upon reaching that page you will have to enter the administrative password. Enter your administrative password or if you hadn’t made any changes to the password, leave it blank and click on ‘Log In’.
  • Now, click on ManagementUpgrade. If you wish to do an automatic update to the firmware, you will need a stable internet connection. Click on ‘Check for new firmware’ under the ‘Firmware Information’ menu. It will check for new firmware versions and click on ‘Upgrade Firmware’ if any new version is available to install it automatically.
  • If you wish to do a manual firmware upgrade, click on the ‘Select File’ button under the ‘Upgrade Manually’ option and click on the firmware file (.bin) that you had downloaded and saved on your desktop earlier. Click on ‘Open’ and now the device will automatically
  • restart within a couple of minutes for saving the changes and upgrading the firmware.

The Cudy WR1000 Ac1200 Router Setup and Installation guide

We all are aware of how COVID-19 is keeping so many people working from home and hence there is no denying that your Wi-Fi router is doing a lot more than helping you stream movies and play games. Home Wi-Fi routers keep millions of people working and they are also connecting an ever-growing range of smart home devices. That means picking one that does the best job for both you and your wallet is trickier than ever. It will not be wrong to say that our daily life is incomplete without a good WiFi Internet connection. Isn’t it? Well, the same applies to a good WiFi router as everyone is going cordless these days. There are a lot of websites that describe the best router, but most of them are just filled with nothing but outdated WiFi routers that no longer work with the latest Internet technology. In this article, we cover Cudy WR1000 AC1200 Gigabit Wireless Router that will handle your current and future wireless networking needs.

Features of Cudy AC1200 Router

Connectivity

Cudy WR1000 AC1200 Smart Wi-Fi Router WR1000 offers next-generation Wi-Fi connectivity, which will provide a wide area of coverage and better speed for uninterrupted working. It comes with an AC1200 Wi-Fi Router WR1000 that has dual bands – 2.4GHz 300Mbps and 5 GHz 867Mbps Wi-Fi Speeds. You can do simple tasks like emails, web browsing, and music listening using the strong 2.4GHz 300Mbps Wi-Fi. At the same time, play online games or stream HD videos using the crystal 5GHz 867Mbps Wi-Fi.

Security

Regarding security, Cudy AC1200 WR1000 ensures high security across the network keeping you safe while doing online tasks. Malicious packets are prevented from entering the network with Firewall protection. Mac and IP Filtering helps in blocking unknown clients. Separate access is provided for the Guest network isolating from the family network. Also, parental control function helps in limiting access for kids and also helps in preventing phishing.

Dual functionality

The best part is the Cudy WR1000 AC1200 router is 2-in-1, not only a router but can be used as a range extender also.

Description

  • Dual-Band Wi-Fi Router
  • 2.4 GHz 300Mbps + 5 GHz 867Mbps Wi-Fi Speeds
  • 5dBi High Gain Antennas for large home coverage
  • Built-in Firewall protect your home network
  • Guest network protect your privacy
  • Support VPN passthrough for IPSec, PPTP and L2TP
  • Compatible with IPv6
  • Easy wireless security encryption at a push of WPS button

How To Log Into Cudy WR1000 Wireless Router?

Here are the steps to log into Cudy WR 1000 Wireless Router:

  1. Open your web browser (e.g. Chrome, Firefox, Opera or any other browser)
  2. Type 192.168.1.1 (the default IP to access the admin interface) in the address bar of your internet browser to access the router’s web-based user interface.
  3. You should see 2 text fields where you can enter a username and a password.
    • The default username for your Cudy WR1000 V1 is admin.
    • The default password is admin.
  4. Enter the username and password, hit Enter and now you should see the control panel of your router.

What is the Default Login for My Cudy AC1200 Router?

The default logins for Cudy WR1000 are as follows:

  • IP Address: 192.168.10.1
  • Username: admin
  • Password: admin

Note: If you are not able to log in to your router, then you are probably entering the wrong username or password. Remember to make a note of both after you have changed them.

How to Install Cudy wr1000 AC1200 Router via Android /iOS

The following are the steps to install Cudy WR1000 Wireless Router through Android/iOS:

  1. Connect the Router to power.
  2. Open the phone WiFi settings.
  3. Search the WiFi name of your Router.
  4. Then open the browser and type 192.168.1.1 and click enter.
  5. Click the Wireless Repeater option.
  6. In the dialog box, choose the Range Extender option, then choose the network you want to extend.
  7. Enter the WiFi password and click Save/Apply.

How to Install Cudy AC1200 Router via Computer?

The following are the steps for Cudy Router setup through Computer
1. Connect the LAN ports of the router to the computer with a network cable.
2. Connect DC IN Ports with Power adapter.
3. Open the browsers and type 192.168.1.1 or ap.setup in the URL and hit Enter.
4. In the dialog box, choose the Range Extender option, then choose the network you want to extend
5. Finally enter the WiFi password and click Save/Apply.

How to reset the Cudy AC1200?

Here are the steps to reset your Cuddy AC1200 Wireless router:

  1. Clicking on the reset button at the back or at the bottom of your router.
  2. Hold down this small button for approximately 20 seconds, (you may have to use a toothpick)
  3. Your modem will get restored to the factory settings. What you need to keep in mind is that when you reset your modem, you will lose your connection online. It is therefore better to take an expert’s assistance in this regard.

Note: If you do not have enough information, it is obviously recommended that you should get help from a person who has all the knowledge about this topic

Why is the Cudy WR1000 Router Page Not Loading?

If the login page is not loading, make sure the device you are using is connected to the wi-fi. You will also need to check if the wrong router IP address is set as the default one.

Having Issues Loading/Problems With Speed on Cudy WR1000

In this case, your network is probably using a different IP address. If this occurs, consult our IP address router list, and locate the right address. If you need any help, check out our tutorial on how to find your router’s IP address.

Final Words

We understand the criticality of the current situation and hence, in this article we covered one of the best wireless routers out there in the market – Cudy AC1200 Wireless Router. With Cudy WR1000 AC1200 router in-home or office, you can enjoy high performance, more flexible internet connection, and secure working/browsing over the WiFi network. We also covered the common issues faced by the Wi-Fi router users and their solutions. We will come up with solutions to more issues.

Coredy e300 Wifi range extender Setup

If you are facing trouble in streaming, playing games, and doing your office work, then Bring home the brand new Coredy e300 Wifi range extender. The wifi range extender boosts your signal strength and improves the actual wifi signal. Here we will learn about Coredy e300 extender Setup-

Wifi range extender

A wifi range extender is an electronic device that boosts and extends your wifi network and signal eliminating the dead zones of your house.
It works as a medium or bridge between the wifi router or access point and the devices that are out of its range. E300 transfers the wifi signal to the dead zones of your house or office.
It receives the signal from the data generating device( router, mobile, or computer) and repeats it to the other parts of your house.

Why should you use the Coredy e300 extender?

The Coredy e300 extender comes with multi-function technology and also works as an extender as well as a router or access point.
This extender is laced with high-technology that enables seamless connectivity even in the dead zones of your house.

Coredy e300 extender setup

The e300 extender setup has two steps:

  1. Powering on the extender
  2. Connecting the extender with an existing network
Powering on the extender

Before going to any further steps, you need to power on the e300 extender to enable it to connect with the available networks.

  • Turn on the extender using the power on/off button.
  • Set the mode switch button to ‘repeater’ to use the device as a network extender.
  • Plugin the extender to a power source. (If possible, in the same room where the router is connected.)

Note: The extender should be put close to the access point when
connecting for the first time.

Connecting Coredy e300 extender to an existing network

The extender can be connected to an existing network in two ways that are:

  1. Using WPS
  2. Using a web browser

Connecting Coredy e300 with a web browser

  • Open the wifi network manager software on your mobile device or computer and search the extender name i.e ‘Coredy e300’ by default.
  • Click on the extender’s name and enter the pin or password to connect your mobile device or computer with it.
    ( The password or pin is printed on the extender’s rear panel.)
  • Open a web browser in your device and search ‘http://ap.setup/’ or enter the IP address 192.168.10.1 in the address bar.
  • If required, login to the admin page by entering ‘admin’ as both username and password (Both are in lowercase).
  • Go to mode wizard and select the repeater option.
  • Click on the select button to choose the network you want to extend. Refresh the list if the network list is not loaded properly.
  • Enter the password or pin of the existing network in the space.
  • Click on apply and wait for some minutes for the extender’s restart.
  • Search and connect to the extended network. (You have to enter the same password you entered while connecting to the extender).

By default, the new name of the extended wifi network is ‘ Coredy
E300_Ext’.

Note: If the connection is not established with the new wifi network, the WLAN led will keep blinking, and the new network name will not be updated.

  • Unplug the extender and shift it to about halfway between the weak zones or dead zones of your house and the router.

Note: Make sure that all three WLAN LED lights amber at the same time(this indicates a suitable position, region for the extender).

Tip: Place the extender at a higher region so it has minimum barriers such as walls, ceilings, and windows.

Coredy e300 wifi extender setup via WPS

The Wi-fi protected setup (WPS) comes with most of the routers and repeaters to make connecting to a secure and protected wireless network from a computer or other devices easier and simple.
The WPS setup allows you to connect to a wireless network without entering the username and password.
Different manufacturers use different terms for the WPS button:

  • Push ‘n’ connect
  • Wifi simple configure
  • PBC
  • Quick secure setup(QSS)

The steps to connect to a wireless network using the WPS button are the following:

  • Press the WPS button present at the extender’s front panel. (The WPS led will blink after turning on.)
  • Wait for 1-2 minutes and then press the WPS button of the router or the access point.

The network name will automatically change to ‘Coredy E300_Ext’ after a successful connection. Also, the WLAN-1 LED will turn amber.

  • Confirm the connectivity via the wifi device or the computer.
  • Unplug the extender and shift it between halfway between the
    router/access point and weak zones/ dead zones of your house or office.
  • Place the extender to a higher, upraised location enabling a minimum of barriers such as walls, windows, and ceilings.
  • Find and connect to the wifi network after shifting the extender from the computer or other device.

Note: Make sure that all three WLAN LEDs are blinking.

Using coredy E300 as an Access Point

The coredy E300 wifi extender allows you to use it as an Access Point for data transmission in your house or office.
The access point is networking hardware that allows one or more wifi devices to connect with a wired network.
It connects to wired switches, hubs, and routers via ethernet and emits a Wireless local area network(WLAN, wifi) at a selected place.

Configuring the Access Point

  • Switch the access point to on by turning the On/off button to on. Change the mode to access points.
    The mode switch is present at the side part of the extender/repeater.
  • Plugin the access point to an electrical switch.
  • Connect the access point to the wired port using the ethernet cable that came along with the access point/extender.
  • Open wifi manager in your computer or device and search the access point network name Coredy E300.
  • Select the connect option and enter the username and password or PIN number present at the AP’s label rear panel. (If required)
  • Open a web browser in your device or computer and enter
    http //ap.setup admin or http://192.168.10.1/ in the address bar.
  • Enter the username and password on the open page. (Both the username and password is admin).
  • Go to mode wizard and select the option access point.
  • Select the security as WPA2/WPA mixed and enter the security password or pin in the key field.
  • Click on apply and wait for a minute for the access point’s reboot.
  • Search and connect to the new wifi network on your computer or device.

Note: The access point will generate a new extended wifi network named ‘Coredy E300’ and has the same password to the device’s wifi network.

coredy e300 wifi extender setup as a router

The Coredy E300 wifi extender setup comes with multi-modes and can also be used as a router.
A router is a wireless hardware that connects to a modem directly via a wired connection. It communicates and creates a network with your wifi network using the in-built antennas enabling internet reach to a wide area in your house or office.

Configuring the Coredy E300 router

  • Take a modem, prepare it, and unplug it from the power source. (If it has a battery backup, remove it).
  • Connect the modem’s cable to the Coredy router’s blue WAN port. Then insert the battery inside the modem.
  • Turn on the Coredy router/extender by switching the on/off button to on. Select the mode as Coredy e300 router from the mode change option.
    (The mode switch option is present at the side panel of the router).
  • Connect a device or computer to use the ethernet cable or connect to the wifi network.

Tip: We prefer using a smartphone for connecting to the wifi network. Find the wifi network named ‘ Coredy E300’ and enter the password or PIN number present at the router’s label.

  • Open your preferred web browser on your computer or device and enter http://ap.setup/admin or http://192.168.10.1 in the address bar.
  • Enter the username and password if asked(both are admin in lowercase).
  • Select coredy router on the mode wizard option.

configure the internet connection by obeying the following steps:

  • Your ISP will provide these details:-
    The ISP configuration details for the DSL account
    DSL username and password
    Static or dynamic IP address
  • After receiving the details, if the service provider is offering you these DSL details, choose ‘ADSL Dial-up(PPPoE) and enter the username and password received for the DSL.
  • Be sure that the security type is WPA/WPA2 mixed and enter the
    password in the key field.
  • Click on apply and wait for some time for the router’s reboot.
  • Positioning the router
  • Make sure to position the router within the operating range of the wireless network.
  • Place the router at the central access point(if possible).
  • Make sure the router is connected to an AC power outlet as well as an ethernet cable.
  • Also notice you have minimum barriers between the router and the access point.

Note: If the network speed is still low, try to change frequencies for its solution.

Coredy E300 wifi extender Power LED light status WPS LED status

The extender’s WPS, WAN/LAN, and LAN Power led blinks in multiple colors to indicate multiple statuses of the extender.
The LED’s light and its statuses are:

  • Lit amber: It indicates the starting of the extender/router/access point.
  • Blinking: It indicates that after pressing and holding the WPS button for three seconds, you are able to use WPS for linking to a wifi network and the linking is successfully in progress.
  • Off: It indicates that the extender/router/AP is powered off i.e not connected to a wifi network or power supply.

WAN/LAN LED status

  • Lit amber: it indicates that the extender/router/AP is starting.
  • Blinking rapidly: It indicates the transfer of traffic by the port.

LAN LED

  • Lit amber: It indicates that the extender has detected an ethernet connection to the AP or any other device.
  • Fast blinking: it indicates the transfer of traffic by the port.
  • Off: it indicates the absence of an ethernet connection.

ap setup

WAVLINK ARIEAL G – AC1200

WAVLINK AC1200 High Power Dual Band WiFi Range Extender setup using ap.setup
The speed provided is incomparable with other Wifi Boosters with 5GHz 900Mbps and 2.4GHz 300Mbps.

Beamforming Technology– Remain always connected to your Internet with the help of latest beamforming technology. It works by providing bandwidth to your appliances even when you move around.

The different mode in just one device– Router Mode for the time when you want to use it as a router. Repeater Mode when you want it to wirelessly extend the signals for you. AP Mode works as a hotspot when connected with an ethernet cord to your router.

Installation within 10 seconds– Push WPS and the extender will configure with your router.

Wavlink AC1200 Setup via browser

  • Firstly, Plugin your device right next to the router and wait till the power LED gets stable.
  • Now you need to switch the button on the left side of your repeater to the repeater mode.
  • Wait till the lights get stable.
  • Grab any of your devices like computer or laptop and look for wavlink wifi network in the WiFi list. It will come up Wireless-N or Wireless
  • After connecting to the network open a browser and in the URL type http://wifi.wavlink.com or 192.168.10.1 or ap.setup.
  • When asked for a login password type in admin on the setup page.
  • Follow the on-screen instructions and setup your wavlink ac1200 repeater.

ALC AMR300N Wi-Fi Repeater Setup, Troubleshooting, Review

No doubt, if you use a WiFi router at your place, you are familiar with the WiFi repeater too. Wi-Fi repeater is also known as WiFi extender. Even though the name sounds different, the product and its functions are the same. However, a WiFi extender or a repeater extends the range of your existing WiFi network, just like its name implies. It doesn’t need any fresh device to boost the range of your current device, as it amplifies the network blanket of your existing WiFi router. As there are several options that are available for the WiFi router, you will get several WiFi extenders, depending on your choice. However, the specifications will be varied for each of them. Talking about the topic of this article, ALC AMR300N Wi-Fi Repeater.

The Wi-Fi extender provides the single with a WiFi frequency up to 2.4 GHz. Its coverage can be made up to 300ft LOS. Also, you can expect a maximum speed of up to 300mbps from the device. The operation temperature of the AMR300N Wi-Fi Repeater is in the range of 32°F -104°F. And, you don’t have to worry about its security. As the devices have all the security functions with WEP, WAP, and WAP2.

And, this is not all, the device is available with many more features. You will get to know every detail about the device, once you go through these words. So, please have a look.

ALC Extender Features

Everyone picks up electronic gadgets depending upon, what features the device has. And, once you go through this list, I’m sure, you won’t look for another option for a WiFi repeater or extender. Please have a look at the amazing features of AMR300N WiFi router.

1) Wireless Ethernet

Add an Ethernet port where you didn’t have one preceding. The Wi-Fi Repeater incorporates an Ethernet port to connect your “wired” gadgets and afterward sends remotely to your switch.

2) Eliminate “Dead” Zones

Lift your Wi-Fi signal in the dead zones of your home by adding the Wi-Fi Repeater.

3) Plug and Play

The Wi-Fi Repeater just plugs into an AC source for power and rapidly associates with your Wi-Fi switch with a press of the WPS button.

4) 300 Foot Range

The Wi-Fi Repeater has a scope of up to 300ft with an immediate view.

5) 2.4GHz Compatible

The Wi-Fi Repeater works using the 2.4GHz recurrence, which is the most well-known kind of Wi-Fi utilized.

6) Secure

The Wi-Fi Repeater Security highlights WEP, WPA, and WPA2, a similar sort of security utilized in Wi-Fi switches today.

How to Setup ALC AMR300N Wi-Fi Repeater?

Set up a cycle of the WiFi extender or repeater isn’t as protracted as the WiFi switch. Set up of WiFi expanded will pardon a couple of steps that you may have performed during the WiFi switch establishment. Here, you will realize, how to setup AMR300N Wi-Fi Repeater without any problem. Along these lines, we should move further.
The most precise technique for connecting the unit is using the WPS button.

  1. Plug Extender into standard divider source having 120V. In the wake of finishing establishment, you can change the area of the Extender.
  2. Press and hold the WPS/Reset button for two seconds until the Status LED begins blinking quickly.
  3. Within two minutes, press the WPS button on your remote switch for a few seconds.
  4. This Extender will reboot and then link with your remote switch. Note the Extender’s name (SSID) will be equivalent to your home Wi-Fi in addition to “_EXT” on the end. Ex. homewifi_EXT

Things to remeber while doing ALC extender setup

: If the WPS work isn’t working or the Status LED doesn’t flicker, reset the unit by pressing the WPS/Reset button for six seconds.

Kindly take note:

If you need to keep the steady connection between your switch and this extender while using the Extender mode, try to introduce this Extender in the most reasonable position.
An incredible method to do this is by checking the Wi-Fi signal on your cell phone after this Extender is introduced. In case that the sign is under 2 bars, we suggest changing the area.

Setup AMR300N Wi-Fi Repeater via the web browser

  1. Plug Extender into standard divider source having 120V. After establishment, you can change the area of the Extender.
  2. On a phone, go to your Wi-Fi settings and select ALC Wireless-N. You may get a message expressing the Internet isn’t accessible, this is ordinary. No password is required.
  3. Open a program and enter ap.setup or 198.168.10.1. The login screen will show up. Enter the default password, “admin” and hit Login.
  4. The Wireless page will show up. Hit Wizard at the lower part of the page. On the Wizard page, click Repeater.
  5. Select your Wi-Fi range and enter its password. Name your Extender in the Extender SSID field. Hit Connect.
    Return to your telephone’s Wi-Fi setting and select your new Extender’s SSID. Whenever asked after the Extender reboots, enter your primary Wi-Fi password.
  6. Go back to the internet browser and hit Back. Enter admin as password again to return to the Extender site page. Select Setup at the lower part of the page. Select Time Zone and snap Apply. The Extender is currently prepared to utilize.

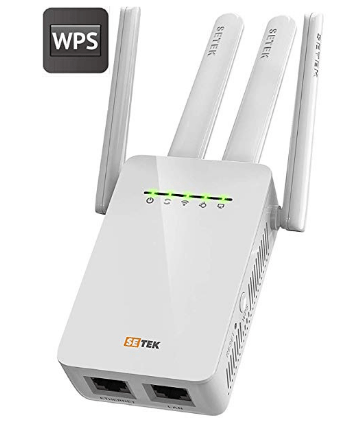
AMR300N Extender Led Status

Every LED has some meaning. Like, universally, red light is for danger, and green light is for safety. Likewise, the AMR300N Wi-Fi Repeater or extender also has some Led lights on it which has some meaning behind its ON, OFF, or blinking process. You will learn the meaning here:

  • ON: If the Led light is powered ON, it indicates that the device is ON and it is working properly.
  • OFF: If the Led light is powered OFF, it indicates that the extender is not receiving the electrical power.
  • Slow Flashing: If the Led light is flashing slowly, it means that the device network is disconnected.
  • Fast Flashing: If the Led light is blinking fast, it indicates that your device WPS is connecting to the router or AP.

Reset

Sometimes, you feel that the device is not working properly or any other issue, and you need to reset your device.
So, to reset your Wi-fi extender, please press or switch the reset button and wait for 10 seconds. Switch it back on, or release the button. This will reset all the previous settings and will allow you to modify them as per your needs.

AMR300N Wi-Fi Repeater Firmware Update

What firmware update means?
t is nothing but the process in which you update the version of your device, where, the firmware upgrade replaces the older version of your software with a new one or fix the bugs.
To proceed with the process of firmware upgrade for AMR300N Wi-Fi Repeater you can go with the process given below:

  1. Go to the Setup
  2. Visit Firmware Upgrade located at the web management interface. A popup window will appear on the screen.
  3. Hit Browse or Choose File. You will have to select a firmware file to upgrade. You can download the latest version through its website.
  4. Hit Apply
    And the system will start upgrading the older version with the new features.

Issues and their Resolutions

How can I change the password of AMR300N Wi-Fi Repeater?
Everyone knows that the default password is Admin, and everyone can see it. If you don’t change it, it can be a security issue. So, it is always advisable to change the default password. How to do that? Well! It is not at all a tough operation. Have a look:

  1. Please hit Setup
  2. Hit the System Safety menu on the web management interface. And you will see a popup window is opened on your screen.
  3. Kindly hit the Apply button.
    And your work is done.

AMR300N Wifi Extender Review

I bought this WiFi extender because our switch is toward one side of the house and our temple, where our widescreen television is found, is at the opposite end, around 64 feet away, with five dividers in the middle of them and when viewing YouTube recordings the sign was continually dropping, making the recordings buffer. It is turning out brilliantly for that.
I was needing a WiFi extender that had an ethernet port on it and I thought this one had one since it says in the portrayal that it has “Wired Connectivity: Ethernet”.
With the picking up of this device, my search is finished for a good WiFi extender. I am happy with the features of the AMR300N WiFi is providing. And, no doubt, I will recommend this extender to each one out there who are looking for a good option. Highly rated.

Get setup with ap.setup for other details.