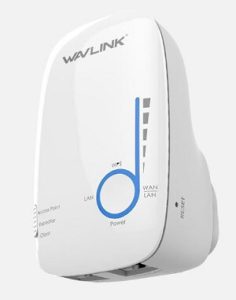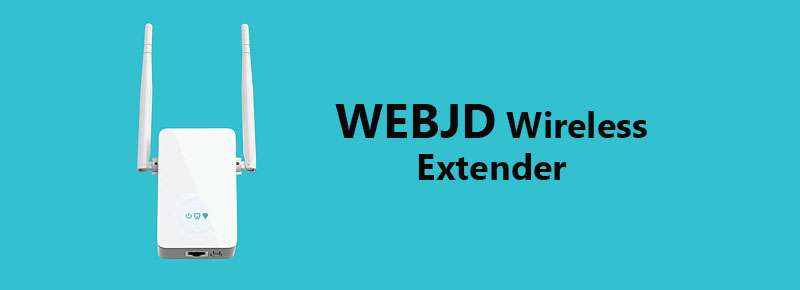
WEBJD Wireless extender
The WEBJD Wireless extender expands the coverage of mobile phones, google chrome cast, Alexa Echo, smart TV, etc by connecting with the current router. It is a single band extender with two external antennas that raise the range upto 3000 square feet. Therefore, drops the dead zones by entering through solid walls, doors, floors, etc, and presents a stable video streaming, video conferencing, connecting to WiFi, and online gaming experience. The latest WEP encryption retains your network security protective. It fulfills a mighty speed of 450 MBps and provides a lag-free internet experience. Easily connects with a maximum router with universal and superior Wi-Fi communication standards. Due to the thin and flat design, it fits everywhere.
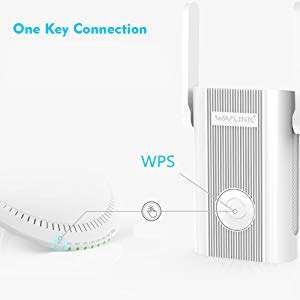
Cutting-edge technology with one push-button setup allows you to configure the device as an access point, router, client, WISP, and repeater mode. The inbuilt signal finder spots the best location with one glance. You don’t need to hesitate if the power connection is not stable because the fry and power surge protector moderates the variation in incoming voltage. The Alexa, smart TV, speaker, IP cameras compatible feature permits you to connect and enjoy every moment. The hardware installation of the extender are as follows
WEBJD Wireless extender Installation
Open the WEBJD shipment box and put all the pieces of equipment including the extender in-plane surface. Read the WEBJD Wi-Fi extender manual carefully before going to install it. Now follow these straightforward steps to achieve the installation
- Put the WEBJD extender and the router in the same room with a low distance. Power on your router.
- Power on your extender by unplugging it and plug it back in after 12 seconds.
- Thumb down the WPS button on the router and alternately the WEBJD extender button too.
- You will notice that the LED lights on the extender start lightening. It means the extender is detecting the router connection.
- After some time, the illuminating LED light turns into a hard one. If it does not transform onto a hard one, then shift the position of the extender, if required. After completing the hardware installation, you can now migrate to the WEBJD setup action.
WEBJD Wi-Fi extender Setup
The WEBJD Wi-Fi extender setup is the most manageable setup. You have to chase its official site from the web browser. To obtain the web interface of the extender, join the extender internet port device to the LAN port of the router. Now get a connection to the router with the PC using an ethernet wire. For moreover info, catch these manageable and easy directions.
- Join your PC or mobile phone to the extender network utilizing the WiFi option.
- To get the flag signal, remark that the status of the WEBJD extender is intermediate-way between your Wi-Fi-enabled device or PC and the router.
- Launch Chrome, Safari, Firefox, or any different browser and type WEBJD Wi-Fi extender default IP address 192.168.10.1 in the hunt box.
- The setup page will initiate and it will demand you to insert the sign-in details.
- Name the default passphrase as admin following determining the language and hit log in.
- It will begin scanning the available networks. Now choose the network you prefer to extend.
- Set the WiFi network passphrase and click save.
- Now chase the on-screen guidance to achieve the setup wizard.
- The WEBJD extender will reboot by itself and experience the connection after connecting to the WiFi network newly. After the WEBJD extender setup is finalized, you can perform after the login page to reach the settings. For that, follow the guidelines described below.
WEBJD Wireless extender Login
After completing the hardware installation and setup, you can manage the device with your mobile device and computer. if you are willing to access the WEBJD WiFi extender login page, then go after the simple instructions.
- Type 192.168.10.1 in the exploration box and click enter.
- The new interface with username and passphrase will arrive.
- Enter the name on both usernames and passphrases while filing with this device.
- Hit the login icon to obtain the extender settings on the web interface.
Troubleshooting Tips For WEBJD Extender
All of the extender issue solutions are to reset it. It is simple and can be easily completed with just a button.
- Plug your WEBJD extender into the AC joint.
- Thumb down the WPS reset button for 12 to 15 seconds.
- The LED lights begin blowing frequently.
- The extender will rise by itself after a few seconds.
- All the customized settings will switch to default factory settings.
Troubleshooting Tips To fix the Weak Signal of the WEBJD extender
If you are facing a weak signal issue, then you must follow these steps.
- Cross-check the status of the extender. Relocate to a new spot to fix a poor signal. It must be nearby to the router.
- Note that the router is not notably distant from 3 meters of the extender.
- Verify that there is no barrier that may form a hindrance in the signal.
- Contact your internet service provider and verify the connection.
Troubleshooting Tips To fix If WEBJD extender not working Properly?
If the WEBJD extender not working Properly, then certain uncomplicated steps will assist you to fix it.
- This type of concern may result when the WEBJD Wi-Fi extender firmware is outdated. Get sure that the extender is up to date.
- Power off your extender. After two minutes secure into the Ac joint again.
- Verify that the AC joint is working properly. Avoid plugging the WEBJD device where there are extremely many devices connected.
- Check the Connection within the WEBJD extender to the router is secure.
WEBJD Firmware Update
The firmware upgrade will fix numerous points and bugs. To do the firmware upgrade, you need to obtain the web management page first. Reaching the web management page will permit you to do not only the firmware but also several more major points. To update the WEDBJD firmware catch certain effortless steps.
- Download the firmware from its official website by listing the model number and name.
- Type 192.168.10.1 in the exploration box and click enter.
- The new dialogue with username and passphrase will show.
- Enter the name on both usernames and passphrases while registering with this device.
- Hit the login icon to reach the extender settings with the web interface
- After the successful login, progress to the wireless network option.
- Choose the firmware selection and then select manually by tapping the browse icon.
- Select the location from your computer where you had downloaded.
- Upload the firmware and pick OK. You will notice that the firmware update method has been started showing the percentage.
- After few minutes of creating the firmware progress, the extender reboots by itself. When the extender starts following rebooting, it determines the firmware update is strong. Updating the firmware will fix bugs and issues and assist in the smooth running of the device.
WEBJD Wi-Fi Extender Review
If you are looking for a wide-range extender with great speed and coverage, then you are in the right spot. It is a great extender with brilliant features. No matter what and how thick the wall is, its signal can penetrate through the walls and metal doors. It is a single band extender with two external antennas that boost the range upto 3000 square feet. It supplies a mighty speed of 450 MBps and provides a lag-free internet experience. The modern WEP encryption keeps your network security protective. Easily connects with a maximum router with universal and advanced Wi-Fi communication standards. You can manage the device by giving voice commands as it is an Alexa-compatible device. The team is very responsive and provides solutions immediately. Overall, a great device and I suggest users willing to purchase this item, should go for it.
FAQs
Q1. Can I connect an IP camera with this device?
Yes, you can connect an IP camera.
Q2. Is this device equipped with WEP security encryption?
Yes, the WEBJD extender is equipped with WEP security encryption.
Q3. How to spot a perfect location for my extender?
To begin with, move the extender to various locations. Note that the extender is not too far from the router. Verify that there is no interference that may generate hindrance in the signal. The inbuilt signal finder spots the best location with one glance.
Q4. How to fix it if my extender is not working?
When the WEBJD extender firmware is outdated, the bugs begin. Get sure that the extender is up to date. Power off your extender. After two minutes plug into the Ac joint again. Verify that the AC joint is working properly. Avoid plugging the device where there are too many devices connected. Check the Connection between the WEBJD extender to the router is proper.
Q5. What is the maximum coverage this device can provide?
The maximum coverage range this device can go to is 3000 square feet.