Ap.Setup | 192.168.10.1 setup
If you are trying to setup your range extender via Ap.setup or 192.168.10.1 then make sure after connecting your extender either via wifi or via ethernet cable, in the address bar type http://ap.setup/. In case this URL isn’t working you can type the default Ip address that is 192.168.10.1 in the address bar.
How to Setup using Ap.Setup?
Some routers enable you to set up the Extender as a wireless access point (AP) or Wi-fi Extender to increase your wireless Coverage. It’ll then act as a straightforward wireless device and its sole purpose is to extend your wireless Network. Note that when a Extender becomes an access point, it’ll lose router functions like port forwarding and DHCP server. You will be able to configure most extender available on amazon via ap.setup To setup Extender using ap.setup follow the steps:
- First and foremost plug the extender to a power Outlet and wait till its power light turns solid Green.
- Press the WPS button on the router and within 2 minutes press the WPS on the extender too.
- Once the Internet light turn to solid green on the Extender, It indicates the extender is connected.
- Other option to configure your Extender is to plug the Extender to the router using a ethernet cable and then using the computer try to lunch the website http://ap.setup/ which is an offline page to setup the extender.
- Lastly, you will see the setup page, follow the on-screen instruction to complete the setup process.
Other Products

OUTDOOR RANGE EXTENDERS
Mainly Used to cover big areas like Hospitals, Factory or community centers. Work well in Harsh weather conditions.
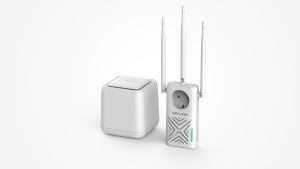
POWERLINE
Powerline device used to deliver high speed wired connectivity mainly used to connect media Devices like Smart TV, Bluray Player or Gaming Console
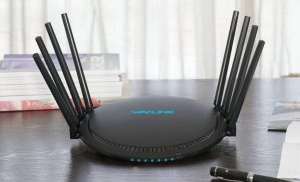
ROUTERS
Powerful Wi-Fi, designed for your home. Available in 2,4,6 antennas that can stretch Wi-Fi to the every part of the home.
CF-WR302S MSRM US300 Range Extender Setup
This device is capable of extending your Wi-Fi signals upto 30-40 feet 360 degree. This is a extender/repeater not a booster so its only going to extend what your router provides you. MSRM US300 range Extender Setup can be done with the help of 192.168.10.1 or ap.setup. This device is portable and small. Setup of CF-WR302S MSRM US300 extender can be done with any working cell phone with updated browser. Easy MSRM US300 Range Extender Setup Via Browser.
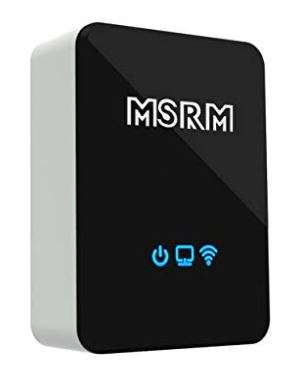
- Plug the extender in ,wait for the led light to get stable ,then find “MSRM” in the wifi list on your phone or laptop. Connect to “MSRM” network name. Being an open network it won’t require any password.
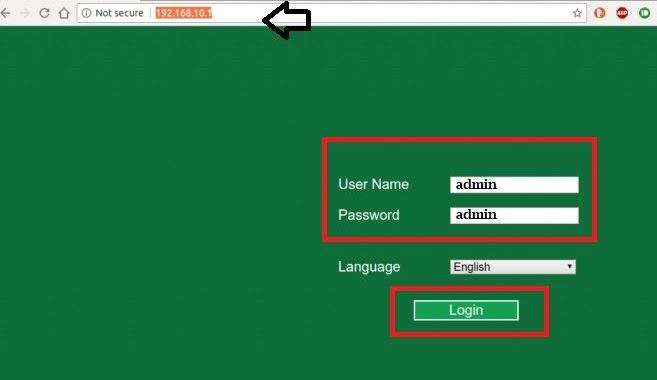
- After your phone connects to it, open the web browser (google, firefox, edge, safari etc.) and type “192.168.10.1” or “ap.setup” into the URL search box to access the log in page.
- On the log in page, type username and password (both are “admin” by default) to click “login”
- As soon as you login into your device it will ask you in which mode would like to Setup US300 MSRM. Like (Repeater, AP, or Router). Select Repeater.
- Next, it will show you all the available Wi-Fi network names. You will simply need to select your router’s network name there. And subsequently, you will need to type its password for confirmation. Click “Connect” Next.
- It takes around couple of minutes for the extender to save settings. After setup the repeater will reboot. In case you haven’t changed the name of Extender it will show up as your “Home network name” and then “_Ext” at the end. You will be able to find it in your Wi-fi list. You can connect to it using the password password as your router if you haven’t changed it.
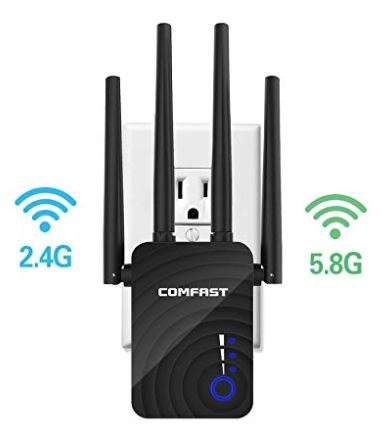
Comfast Wifi Range Extender Setup
Comfast Extender is equipped to provide a speed of upto 1200Mbps. With Internet becoming priority in most homes and offices, its important to have reliable Internet coverage throughout. If you also have Wi-fi coverage issues at home, office or backyard, etc then it can resolve that issue for you. These can work with laptops, gaming consoles, smart Tv’s and Alexa’s too.
How to Setup Comfast WiFi Range Extender via WPS
WPS Setup is the most easiest setup that is offered by most range extender available in the market. It hardly takes 10-15 seconds for the Extender to recognize the router network and get connected to it. You can check here how wps button looks like if you don’t know already. Plus, we recommend you to plug the extender and the router in the same room.
- Wait till the power light on the Comfast gets stable, if its blinking then it means its booting up.
- Now press and hold the WPS on your router for around 2 seconds. As soon as you do that you will see a blinking light on it.
- Within 2 mins push a WPS on the comfast extender too. Now you will find a blinking WPS light on the extender itself.
- In case of strong signal strength, it takes just 10-15 seconds for extender to get connected with the router.
- Once connected the WPS on the router will stop blinking and the WPS on the extender will turn solid.
- If WPS doesn’t work after several tries, try resetting the extender. Click here to learn how to reset any extender.
- After successful connection you can unplug the extender and place it halfway between your router and the place where you need Wi-Fi connectivity.
- Lastly In case WPS doesn’t work, you can connect your Comcast extender Network to mobile or laptop and go to 192.168.10.1 or ap.setup
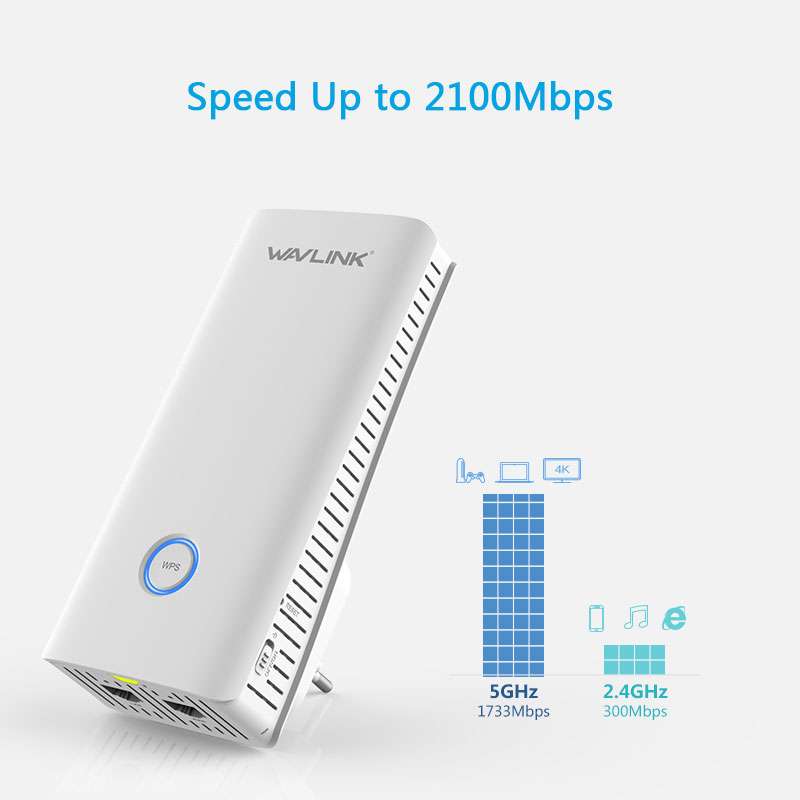
Wavlink AC2100 WN583A6 Boosts Wifi signal
Click here to start Wavlink AC2100 Setup
MU-MIMO technology solves the matter of network signal congestion directly. So mutiple devices will be able to access the same speed of internet, anyplace in your home. With dual band Wi-fi transmission speed reaches upto 2100Mbps. Wavlink AC210 WN583A6 has three modes repeater, router and ap mode. You check Wavlink ac2100 Setup here.
Why ap.setup not working
Most common reason of ap.setup not working can be trying to access the web based URL without connecting to the extender’s wifi network. Lets learn how to resolve this issue-
- Start with simple troubleshooting like unplugging the extender for 60 seconds and trying the URL after that.
- Make sure before you try the URL, extender should be connected to your device like computer or cell phone.
- Also, you can connect computer directly with ethernet cable to the extender and then try accessing the URL.
- Moreover it has been observed some repeater work on http://ap.setup/.
- In case all the above steps doesn’t resolve your issue reset your extender and follow the login steps.
- 192.168.10.1 is also the default IP Address of most of these extender. So after connecting your device to extender you can type this ip address to login.
MSRM US750 Extender Setup via ap.setup
You can type http://ap.setup in the address bar and start the msrm us750 extender setup. With it’s three light indicators on the front we can make sure that our device is working and is providing us WiFi. Lets start the setupMSRM US750 extender setup

- Plug the msrm us750 repeater halfway between your router and the place where you need internet.
- Now connect to MSRM WiFi network name showing up in your WiFi list.
- Once connected open a browser and in the address bar type ap.setup or 192.168.10.1.
- ap.setup login will help you with setting up your repeater within 2 minutes.
- Now type default username and password for ap setup that is “admin”
- Select the network name that you want to extend and type its password.
- Once configured the MSRM US750 extender will reboot and then you will be able to connect your devices to it.
MSRM US750 extender setup via WPS
- For this setup you need to place the extender in the same room as your router.
- Press the WPS on the extender and within two minutes push it on the router as well.
- We try WPS when ap.setup doesn’t work.
- Once the WiFi or WPS LED on the extender turns solid or stable it confirms successful connection.
- Now unplug the us750 repeater and place it wherever you want within the range of the router.
Comfast US750 repeater setup as access point via http://ap.setup
For this setup you need a good quality ethernet cable. It provides more faster and stable connection between extender and your devices connected to it. Make sure you toggle the switch on the repeater to the “Access Point” mode. Lets start the setup
- Attach ethernet cable between your comfast us750 extender and your working router LAN port.
- Turn on the extender by plugging it into a wall outlet.
- Connect to the comfast WiFi network name in your Wi-Fi list.
- Open a browser and in the URL type http://ap.setup or 192.168.10.1
- It will take you to the extender’s login page.
- Type username and password there as “admin”.
- In the ap.setup wizard select “access point” as your mode.
- Type the SSID, password, and security type for your AP.
- Once configured try connecting your computer/laptop/phone etc.
MSRM US302 Wi-Fi Extender Features
Toyia MSRM is a reputed brand that manufactures Wi-Fi router and a range of extenders. The MSRM US302 supports up to 300MB/s network speeds. It has a range of 172 meters. It is a dual antenna device supporting 2.4GHz and 5GHz networks respectively. This Wi-Fi range extender removes any obstruction like walls, electronic devices, and so on by using the ‘Dual-Rotation’ antennas. The 802.11b/g/n feature provides you stable and consistent high-speeds. It has an easy-to-setup software making it user-friendly and quicker to use.
MSRM US302 Wi-Fi Extender Setup Using Browser:
- Make sure you have an active internet connection at home. Also, make sure the router is connected to a power source.
- Plug the MSRM us302 extender into a power socket close to the Wi-Fi router and then power it ‘ON’.
- Now using your computer, laptop or any other mobile device, switch on Wi-Fi and search for the Wi-Fi network that says ‘MSRM-xxx’ and connects to it. Initially, it will have no security nor password.
- Open the browser in that same device and then search for ‘192.168.1.1’ or ap.setup/admin. You will now be redirected to a page that asks you to enter the administrative username and password. Enter ‘admin’ in the ‘Username’ and ‘Password’ dialog boxes respectively.
- Click on the ‘Repeater Mode’ option. Now from the list of Wi-Fi networks, select the Wi-Fi network of your main Wi-Fi router that you wish to extend.
- You will now get two options whether to set a new name (SSID) and password or use the existing router’s ID configurations. Choose the one that you like.
- On the next page, you will need to configure the MSRM extender’s network. Enter the name (SSID) and password as necessary.
- You might have to do this process twice for the 2.4GHz and 5GHz networks respectively (The password must be the same as that of the router).
- Once you click on ‘Next’ you will be redirected to a page to confirm the settings. Once the configuration is done, wait for two minutes for the extender to setup and then you can connect your devices once again to the extender’s network.
WPS Setup For MSRM US302 Repeater
- Make sure you have both your main WI-FI router and the MSRM US302 Wi-Fi range extender connected to a power supply. Make sure they are placed close enough.
- Click on the ‘WPS’ button present at the back of your Wi-Fi router. Within two minutes press the ‘WPS’ button on the MSRM range extender present below it.
- The MSRM repeater should automatically connect to the Wi-Fi network of your main router.
Firmware Update On msrm us302
- Make sure your extender is connected to a power source and is powered ‘ON’.
- On your Wi-Fi devices like computer, laptop or any other mobile device, go to Wi-fi List and look for the Wi-Fi network that says ‘MSRM-xxx’. As it will be an open network you won’t require any password to connect to it.
- Open any browser(google, firefox, safari, etc) on the same device. Now, in the address bar type ‘192.168.1.1’ http://ap.setup/admin. Subsequently on the next page type “admin” as username and password.
- On the ‘Home Page’, go to Management Firmware Update.
- Click on ‘Upgrade the firmware’ under the Automatic Updates tab. Make sure you have a stable internet connection to update the firmware if necessary.
- Once upgraded, it might take about 2 minutes for the extender to setup and reboot.
Factory Resetting msrm us302
Method 1:
- Once the extender is powered ‘ON’, use a paperclip or a pin to press and hold the reset button at the side of the unit for about 10 seconds.
- After some time, you will see that the LED will turn red indicating that it is rebooting.
- Wait for about 30 seconds for it to reboot. If you see just the power LED on the extender then it means it is resetted properly.
Method 2:
- Make sure either your computer, laptop or mobile is connected to the Wi-Fi network of the MSRM extender.
- In the same device, open the browser and search for http //ap.setup or ‘http://192.168.1.1’.
- Once you enter the login page, enter the administrative ‘Username’ and ‘Password’. On the configuration ‘Home Page’, click on the ‘Management’ option. From the drop-down menu, click on ‘System’, and then click on the ‘Factory Defaults’ button.
- Click ‘OK’ when it asks for the confirmation.
192.168.10.1 IP address used for which devices?
Ordinarily, the 192.168.10.1 IP address is typically used to access the various repeaters’ login admin panel. Below are the following repeater’s name outlined which helps access your these repeaters admin page.
- Comfast WiFi Range Extender
- CF-WR302S MSRM US300 Range Extender
- Wavlink AC2100 WN583A6 Boosts WiFi Signal
- Wireless-N Repeaters, etc.
How to do the 192.168.10.1 WiFi repeater setup?
You can access the 192.168.10.1 WiFi repeater admin page using this IP address. Lets learn how-
192.168.10.1 wifi repeater login with user interface
These are exhaustive points given for the 192.168.10.1 WiFi repeater setup.
- Ensure that your range extender is connected with the power source adequately.
- Also, confirm your extender is setup with your router impeccably.
- Subsequently, connect repeater’s internet to your computer.
- Now, you have to launch a browser.
- Type ap.setup or http://192.168.10.1 on the internet explorer addressing bar .
- Hit “enter” and wait until its admin page is demonstrated on your browser.
- When the wifi repeater login page appears on your computer screen then enter your repeater login credentials.
- Type in admin field your repeater’s username and default password.
- Henceforth, click on login button.
- So this is how you can login into any Wi-fi repeater/ Internet Booster using 192.168.10.1.
192.168.10.1 wireless repeater setup with Ethernet cable
If you wish to make your wifi repeater/Internet Booster setup effortless and hassle-free. Then, you should use the Ethernet cable connection setup. Use the below given steps, for your repeater set up with an Ethernet cable connection.
- First and foremost, Setup your main host router or access point.
- Then, place your Wifi repeater in close proximity to your router.
- After this, connect the wifi repeater with an electrified power source.
- Then, take an included internet cable or Cat 6 cable.
- Connect the Ethernet cable with your repeater’s LAN port.
- Likewise, join other end of the cable with your router’s LAN port.
- Consequently, the 192.168.10.1 WiFi repeater set up with a wired connection is accomplished now.
192.168.10.1 WiFi repeater setup with AP mode
We recommend you to go for Access Point (AP) Mode in case you want faster Internet speed. Basically, AP mode provides better internet speed than Wifi Range Extender Mode. Lets learn how we can complete this setup-
- Firstly, you need to connect your wireless repeater with an ethernet cable or cat6 cable.
- Make sure the router, repeater, and computer are plugged in to power outlet.
- Next, connect your computer to “Repeater’s Network Name”.
- Into the Browser type 192.168.10.1 IP address next and hit enter.
- After this, your wireless repeater login box is shown on the browser.
- Then, enter your repeater username and default password, which in most cases is “admin”.
- The wifi repeater setup page will open next.
- On the repeater setup page, kindly click on 192.168.10.1 wifi repeater setup wizard option.
- On the next window it will show you different methods to set it up. So select access point mode and hit next.
- You will then need to create an SSID and Password for the 192.168.10.1 Access Point.
- As you hit save settings it usually takes 120 seconds for the repeater to show up in your Wifi list.
- Finally open Wifi list on your phone or computer and you can connect to the newly created AP wifi.
WiFi repeater setup with WPS Method
If you are not much tech savvy then follow below mentioned steps to set up your repeater instantly. Make sure you have working router plus it is in the same room as Internet Repeater.
- WPS stands for “Wifi Protected Setup”, in this method you will not have to type any passwords. The Internet Booster automatically gets connected to the near by router.
- To use this method, first of all, you need to press a Wps button on the router. The Wps button looks like two arrows chasing each other in circular motion. Plus once you press this button, the Wps led on the router will start blinking.
- After this, connect your repeater with the power source near to your router.
- Now, you have to hold the repeater WPS button just for one to two seconds.
- After successful Wps Setup the Wifi Led on the repeater will turn solid.
- You can now connect its internet to your computer, hubs, cameras, mobile phone, etc. You will have to use the network SSID and password to connect to its network. The passphrase will remain same as your router’s Wifi password.
Why can’t I connect to 192.168.10.1?
Here are the major factors that might be causing this issue. Read below to resolve this issue.
Reasons to not connect to 192.168.10.1
- Due to an internet connection issue on the router
- Inappropriate or invalid Ip address.
- Using an obsolete version browser.
- Trying to access the repeater login page while it is not plugged in.
- Using outdated router firmware due to which it keeps disconnecting while you browse this IP address.
- This IP address does not belong to your repeater.
Bug fixes and Troubleshooting guide
- To get rid of the above mentioned issues kindly try to update your repeater and router to their latest firmware version.
- Apart from this, use an updated browser while accessing repeater admin panel.
- Make sure to type 192.168.10.1 only into the Address bar or URL. This won’t work if you type it into the search bar.
- In case if none of these methods works, try resetting the extender.
- You can also connect an ethernet cable from repeater to the computer and then try to access the IP Address.
192.168.10.1 wifi repeater reset
Let us walk you through the steps to reset Internet Wifi Repeater or Booster in just 10 seconds:
- Firstly, you need to connect your repeater to an electrical socket or power outlet.
- Then, login into the 192.168.10.1 WiFi repeater setup page.
- Click on Settings or Administration settings tab.
- There you will see an option to reset or reboot the repeater.
- Click on reset and confirm the settings to reset the repeater to factory default settings.
- Another method to reset Wi-fi Booster is by putting a paper clip into the reset hole of the repeater for around 10 seconds. While you do this make sure it is plugged in to the wall. Subsequently, after 10 seconds take the pin out and wait for another 60 seconds and let the Wi-fi booster reboot.
Ultimately, connect your wifi-enabling devices to your wifi repeater internet connection. Hence, enjoy the seamless high-speed and more robust connection with its network after the setup.