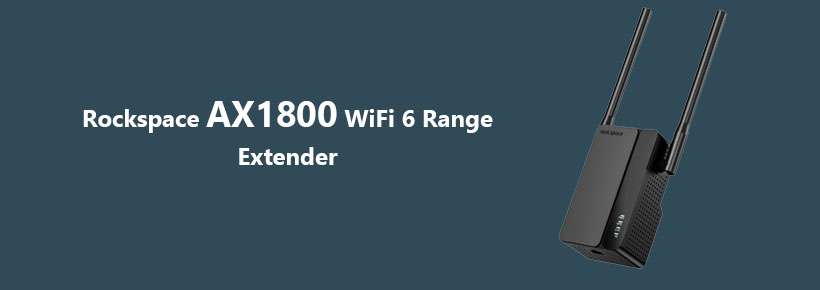
The Rockspace AX1800 WiFi 6 range extender provides blazing high wifi speed with a greater network and technology. It enables four times higher networking speed so that you get the ultra-fast speed and the Gigabit wireless ports that make this extender ideal for streaming and gaming. Moreover, the range extender comes with MU-MIMO technology that can simply deliver high network access to all the connected devices at the same time. Its higher efficiency allows the extender to connect to 30+ devices with a ten times faster speed than any standard Ethernet port. Therefore, its powerful and smart 3.0 USB ports allow sharing the storage space with wireless printers and other files of your network.
However, the Rockspace AX1800 WiFi 6 extender comes with Beamforming technology that provides unbeatable wireless coverage with the help of its four high gain antennas. Its high-range antennas simply boost the signal and access every corner of your house. Well, the wifi 6 range extender can attain coverage of 2500 square feet of area and ensure that you and your family receive the best wifi signal ever.
Astonishing Features of the Rockspace AX1800 WiFi 6 extender
As you know, the Rockspace wifi 6 extender is a dual-band extender and enables a large capacity of storage with a fast accessing internet signal range. Also, you can compare it with the previous generations of technology and will find that it is the most effective extender that deals with the response and access to many devices. However, it requires high-speed transmission for 4K video and large-scale video gaming. Here are the most effective features that prove the working capacity of the extender.
- The Rockspace AX1800 WiFi 6 range extender supports ultra-fast wifi 6 technology that offers AX1800 of Gigabit speed and covers 1600 square feet of area without interrupting your entertainment zone. It is ideal for video streaming and web conferencing.
- It provides a larger capacity of support with the MU-MIMO extender that improves the network utilization rate and simultaneously solves the problem of communication with 30+ wireless connected devices.
- With the setup of the wifi 6 range extender, you get longer whole home wifi coverage. Also, it is furnished with dual 5dBi high range antennas that seamlessly cover long distances and a dual-core strong and powerful processor that is reliable for boosting the internet speed and moving anywhere around in your house without losing the connection.
- Well, it is universally compatible with both wifi 5 and wifi 6 enabled devices. Just plug the Ethernet cable into the game consoles, repeaters, or routers and turn this extender into the access point.
- Simply, the Rockspace wifi range extender is furnished with two WPS buttons. One is for 2.4 GHz and the other is for 5 GHz networking bands. You can choose any of the networking bands to extend the existing WLAN network to meet your personal requirements.
Therefore, these are the Rockspace AX1800 specs or features. By reading these features you get more familiar with the Rockspace extender.
Rockspace AX1800 WiFi6 Extender Setup
When you are setting up the Rockspace AX1800 extender for the first time, then you have to take care of every step that you will read in this article. Also, you need to make sure that you will not skip any step because it may fail you to access the network connection with the Rockspace wifi 6 extender. If you are trained in extender settings then you can skip these steps. Basically, it all starts with the Rockspace AX1800 installation.
Proceed with the PPPoE password and the username from the or the Genuine Rockspace AX1800 wifi 6 repeater
- First of all, power on the button on the actual wifi range extender and then other wireless devices.
- Hereafter connect the AX800 WiFi 6 range extender to the LAN port of the new wireless device to the WAN port of the WiFi6 extender via an Ethernet cable.
- When you see the LED indicators of the LAN or WAN port turn solid after blinking for three seconds then process the PPPoE username and the password to the new wifi range extender.
- Now you can unplug the wire of the WiFi6 range extender.
Make a connection of the New WiFi range extender to the internet.
- Prominently. Power on the button of the new range extender.
- Therefore, connect the LAN port into the modem and the WAN port into the new wifi range extender by using an Ethernet cable and the LED indicator of the WAN lights on.
This is the first method in which you make a connection of the AX1800 WiFi 6 extender with the new wifi range extender device.
Connect wifi enabled devices to the new wifi range extender
This is the second method in which you use the wifi-enabled devices such as a mobile device to the new wifi range extender by using the WiFi network name that is labeled on the bottom of the wifi range extender. As there is no wifi password set by default. The one more thing you can do to connect the device to the new range extender is to use a wired connection setup. In which the Rockspace AX1800 WiFi6 repeater connects the wired device to the LAN port of the wifi extender via an Ethernet cable. When the LED indicator lights up, the connection is successfully established.
Rockspace AX1800 WiFi6 repeater Setup for better internet access
This is the third method in which you will establish internet access with a wifi range extender. Let’s go through with these steps.
- First of all, enter the IP address of the Rockspace AX1800 wifi range extender 192.168.1.1 into the location bar and press ‘start’ to proceed to the start page.
- Now you have to enter the username (admin) and password (admin) into the password field to log into the web user interface.
- Therefore, set up the time zone and the region and then tap on the ‘next button.
- Hereafter, choose the connection type in which you have to choose from PPPoE, Dynamic IP Address, and Static IP Address.
- Hence the wifi range extender detects the connection type automatically. You simply need to set the parameters and tap ‘next’.
- Now you have to customize the settings of the wifi password and the SSID network name. If you want to hide the SSID then hide and then click on the Next button.
- Hereafter, confirm the settings of the wifi network name and the password and then click next.
- From there you can customize more functions. For that, you need to log into the web user management page again with the default IP address. Now you can customize the functions that you need on the page
Therefore these are the different methods to complete the procedure of the Rockspace AX1800 setup. To access the settings of the Rockspace AC1800 page, you need to walk through with the extender and the repeater setup.\
Rockspace AX1800 WiFi6 Troubleshooting Tips
For the Rockspace AX1800 WiFi 6 extender users who face some issues with the device or due to some technical issue, they failed to access the internet connection. So for those users, who are eagerly waiting for a wizard who helps you in solving the problem then you are reading the right article. Let’s get started without wasting time.
Why is Rockspace AX1800 not working accurately?
Try these steps to resolve your query.
- First of all, you need to make sure that the LED power light of the AX1800 WiFi 6 extender is on.
- Hereafter, push the Rockspace AX1800 reset button with the help of any sharp object.
- Use a paper pin, nail, or your thumb to push the button for more than six seconds.
- When you see the power LED turning solid then it means the AX1800 extender has been restored to the settings into default mode.
Why is Rockspace AX1800 not turning on?
The best way to deal with the problem is to check from the indication of the LED lights that exactly tell what’s the error with the device.
- You can start from the power button, if it is off then push the on or off button of the AX1800 WiFi 6 extender.
- When the LED light starts flashing red or orange, then the device is having a poor or weak internet connection. In that case, move your range extender closer to the modem device.
- In case the client device is blinking red or orange LEDs than in that case. Move the client device to the AX1800 extender.
Why is Rockspace AX1800 not charging?
To charge the Rockspace AX1800 extender, you need to make sure that the power supply is properly supplying the electricity or working properly. Also, verify that the wall socket you are going to use to connect the extender is not damaged. Therefore, open the extender settings and then check the settings. Moreover, you can take technical help or get a new charger to charge your extender. Maybe the problem is with the charger.
What are the steps for the Rockspace AX1800 firmware update?
For the Rockspace AX1800 firmware download the update by walking through the below-mentioned steps.
- Open the preferred safe and secure internet browser on your client’s device.
- Enter re.rockspace.local into the address bar and press enter.
- Now you are on the Rockspace AX1800 login page where you have to provide the username and the password details to get into the settings of the device.
- After the login, the setup page opens, in which you need to click on the administration settings.
- Under the administration option, you get the firmware update option for the AX1800 extender.
- Hereafter, locate the file to get the latest firmware update of the Rockspace AX1800 WiFi6 extender into your client device.
- Hence, tap on the install and it will take 3-4 minutes to upgrade the firmware of the AX1800 range extender.
However, if you face any issue other than these problems then refer to the Rockspace AX1800 manual.
Rockspace AX1800 review
The Rockspace AX1800 WiFi6 Repeater is the best for covering longer or wider areas. As it is equipped with 5dBi high gain antennas and I am surprised with its fast wifi speed. I live in an in-building where the internet service can’t reach, so I did the trick to use the Rockspace extender for my home connection. Also, it is installed in the outermost part of my home wall near the building. The setup of the extender is a five-finger exercise and it allows extending the internet service with two major methods. In case, if you get stuck at many installation steps then you can read the Rockspace AX1800 instruction manual. I would like to recommend to all those people who are looking for the best wifi range extender to cover the wider areas smoothly.