Search for:

victony wa305 new extender setup

Are you facing problems in connecting your wifi network to your mobile devices? Are you getting a slow network speed even after using a wifi network? Do you want to enjoy a seamless and high-speed network in your home without compromising with the dead zones of your house? If your answer is yes for any of the questions above, then bring out the Victony Wa305 wifi extender to your home. It is a complete solution for all your network and connectivity issues. The Victony Wa305 is a wifi range extender that increases the range of your wifi demolishing all the dead zones of your house. Here we will learn about VICTONY WA305 Setup

Victony Wa305 Features

  • Victony Wa 305 provides some stunning features to its users that helps them to enjoy seamless data surfing over the wifi network.
  • The Victony Wa305 performs multiple functions to reduce the quantity of the appliances.
  • It performs as a Wifi range extender to repeat, extend the coverage of the wifi network.
  • Can be set up as a wireless access point that converts a wired network to a wireless network.
  • It also performs as a Wireless router that creates a private ac wireless network instantly.
  • With the transmission rate of 300mbps, the Victony Wa305 extender enables you a comfortable net surfing, video chatting, and much more.
  • With two external antennas attached to the extender, you can easily enjoy web surfing anywhere in your house or office.

The Victony Wa305 Setup

Setting up the Victony Wa305 wifi extender means connecting a complete wifi solution for your home. There are various ways following which you can set up the Victony Wa305 to demolish all the dead zones of your house. The victony quick setup means setting up the Wifi extender in just a few steps. Plug the range extender into an electrical outlet near the host wifi router. Turn on the power Led and wait until it turns solid

Victony Wa305 setup via web browser

  1. Connecting the computer to the extender’s network:
    For windows,
  • If an ethernet cable is connected to the computer, unplug it
  • Open the taskbar and click on the wifi icon to connect it to the extender’s wireless network
    Note: The extender’s wifi network name will be either Victony_Extender_2.4GHz or Victony _Extender_5GHz.
  • For Macintosh computers,
  • If an ethernet cable is connected to the mac os computer, unplug it
  • In the top corner(right) of the screen, click on the wifi icon to connect it to the extender’s wifi network
    Note: The extender’s wifi network name will be either Victony_Extender_2.4GHz or Victony_Extender_5GHz.

Using the quick setup wizard to connect to the extender’s network

  • Open a web browser in your selected computer or device
  • Enter http://ap.setup or http://192.168.10.1 in the address field
  • The default username and password is ‘admin’.(Username and password are case sensitive)
  • For secure management purposes, you can also create a new username and password
  • Click on confirm
  • Select the SSID(Network name) of your 2.4GHz host router
  • Enter the router’s password(Not the password that is created by you for management)
  • Click on next
    Or,
  • Select the SSID(Network name) of your 5 GHz host router
  • Enter the router’s password(Not the password you created)
  • Click on next
    You can either use the default SSIDs or change it for the extended network
  • Click on next
  • Check the wireless settings and save it
  • The LEDs should be turned on
    And that’s it. Just sit back wherever you want to in your house and enjoy the seamless and smooth wifi net surfing.

Victony Wa305 wifi extender setup via WPS button

Every host router and extender have the WPS button attached to them.

  • On your host router, press the WPS button for about 2 secs
  • Similarly, press the WPS button on your extender for about 2 secs
  • The signal LED will turn solid blue after some time that indicates that the connection via the WPS button is successful.
  • And that’s all, ‘Enjoy the smooth and strong wifi net surfing from any place of your house eliminating all the dead zones.

Victony Wa305 wifi extender firmware update

Updating the firmware means upgrading the extender which ensures better performance of the extender. You can update the extender’s firmware by following the simple steps given below:

  • Open the official website of the company and download the latest firmware file
  • Visit the website ap.setup and enter the username and password that you have set for the extender
  • Open Settings and go to system tools
  • Click on Firmware upgrade
  • Browse the downloaded firmware file and click on upgrade
  • Reboot the extender after the upgrade
    Great, your extender’s firmware has been successfully upgraded.

The Victony Wa305 user manual

The user manual of the Victony Wa305 contains various important information and tips for the users.
It contains many important topics like:

  • The device overview: A short brief of the device it came with.
  • Device setup: It contains steps and tips to set up the device.
  • Network customization: It helps you to configure the network settings of the device.
VANIN EC4-1200 Range Extender

VANIN EC4-1200 Range Extender Setup, troubleshooting, & review

The VANIN EC4-1200 range extender comes with advanced technology that eliminates or vanishes all dead zones of your home. It is mainly used for extending the network coverage of the existing router up to 1500 square feet and surged its network in approximately 20 devices. This extender is very unique because it works in multi-mode (AP/Repeater/Router mode) functions basically for providing the better service to HD 4K streaming, play lag-free gaming, video chats, or conferencing, or transferring the files.

The VANIN wifi extender also provides the network connection through the 2 Gigabit Port and using the MU-MIMO Technology. Its Gigabit Ethernet ports usually make a stable and fast connection between your wireless devices. The VANIN ec4-1200 wifi booster universally is very compatible with up to 99% of access points, any standard routers, modems, or gateways. Ordinally, this wifi range extender works with 2.4GHz and 5GHz band Internet service providers. It performs well with almost any wireless networking router and access point.

VANIN EC4-1200 Range Extender Installation

Without installing any networking devices, you can not use its services and network. So, firstly install it and solve the “How to connect vanin WiFi Extender” problem by following the below steps.

  • By choosing an optical and ventilating location for your Vanin wireless range extender, place it there.
  • Verify that the Vanin wifi extender location is not too far away from the existing access point or wireless router.
  • Similarly, you can also find a better location to keep it through its smart signal indicator.
  • So, choose the place accordingly or the other option to choose a better location from all this is the VANIN ec4-1200 manual instructions.
  • Choose location accordingly and keep it perfectly there and as well as plug the VANIN extender into the electric power socket.
  • Now, join the existing router network to expand it.
  • To join the network, use an Ethernet cable or you can also use the WPS button.
  • Then, pressing the one-touch joins the existing router network.
  • So, finally, the LED light will flash automatically after properly joining the network.

Thus, the VANIN EC4-1200 wifi extender Installation is complete in normalcy without struggling with its configuration process.

VANIN EC4-1200 Range Extender Login

Some Vanin wifi extender instructions give in below with explained instructions to activate the account of your vanin wifi extender ec4-1200 login.

  • Using its smart 2 Gigabit Ethernet cable port connects it with your Ethernet port using the device.
  • You also have another option to join the network of extenders that is a wireless connection. So, to use it go into your system WiFi list menu and find your VAnin extender name and by putting the VANIN wifi extender password, join the network.
  • Now, your Pc successfully connects with the internet, then to the VANIN extender login, and goes into the web interface.
  • Type the VANIN wifi default IP address or https://www.vanin.com in the address field of the web interface.
  • Wait, the login activating credentials box is open now on the PC screen.
  • Fill in this, the VANIN Extender default password or username.
  • Finally, click on the below side given on your PC “login” option which is displayed on the screen.

Altogether, the VANIN extender login steps are completed in a like manner.

VANIN EC4-1200 Range Extender Manual

The VANIN WiFi Extender Manual has come with some important and with product description. That normally provides the basic vanin wifi extender ec4-1200 instructions. The product designer describes in the manual every part of basic instructions also included in the packaging box accessories parts will be described with a full explanation. It has also given your basic questions answers such as how to set up a vanin wifi extender? How to connect a vanin WiFi Extender? How to log in to the VANIN extender? Or more basic queries of yours. Gṣet your all types of queries through the Juplink extender manual and if anytime you can not understand its given instructions and its answers then don’t worry about it just follow the given instructions to solve your VANIN range extender various problems.

VANIN EC4-1200 Range Extender Setup

There are some instructions to solve your “how to set up the vanin wifi extender” issue. These are given below.

  • Go into the setting menu directly, after completing the VANIN range extender login process.
  • Through the settings menu, you have to change the extenders’ various settings like Advance settings, administrative settings, wireless settings, etc.
  • So, click on the setting which you want to change under its settings menu.
  • Now, change the Vanin wifi range extender setting like convert teh 2.4GHz band network to the 5GHz band network to get the fastest network.
  • After that, apply all the changes into the Vanin wifi extender ec4-1200, just tap on the “save option”.

Thus, the Vanin ec4-1200 setup process is finishing up now. So, these are some steps for the Juplink wifi extender setup.

VANIN EC4-1200 Range Extender troubleshooting

Many times, the ec4-1200 wifi extender shows and causes various problems when it is working and throws the internet. So, to solve its problem follow the given steps.

  • The Vanin wifi extender is not working sometimes, because it is not attached to the electric power properly and does not access the main hub’s existing router network connection. So, before using it, also check again its wiring connection and then start it.
  • If the Vanin wifi extender is not connecting to the internet, it means it is not able to connect to the network connection. So, firstly connect its network connection properly and start its power again and connect the network to check if it’s working now or not.
  • Moreover, the Vanin wifi extender keeps disconnecting, because it is not placed according to the manual. So, change the location of it and then start accessing the network connection.
  • Apart from this, if the Vanin WiFi extender is not connecting to the router, then you have to reboot it and then start its power again within twenty seconds.
  • If your router is outdated then it causes the Vianin Wifi extender not to show up. So, update the Vanin range extender firmware with the latest version.

So, these are some various fixing and Vanin range extender troubleshooting steps.

VANIN EC4-1200 Range Extender review

For the first time, I have bought a new range extender to exceed the network range in the whole home up to 1500 square feet areas. This is the Vanin range extender EC4-1200, which is easily compatible with my oldest router and easily connects up to twenty or more devices to my existing router or access point WiFi. Before using it, I read the manual instructions carefully and when I started working on it. It is really simple, installed without struggle, and does not take much time. So, finally, I am happy using it and I have used this VAnin range extender for a long time. I gei=ve the Vanin range extender reviews to many people.

Frequently asked questions

Q1. How to update the VANIN wireless extender firmware?

There is a way to update the Vanin range extender firmware by going into the web interface. You directly go to the extender setting menu and update your device accordingly.

Q2. How to do the VANIN wifi range extender reset?

Your Vanin range extender comes with a reset button, it is located in the base station of the extender, so by pressing it, you can reset it.

Q3. How to use the Vanin range extender gigabit ports network easily?

You have to connect its network only with an ethernet cable using devices like laptops, PC, or printers. So, connect its Ethernet cable with the port and enjoy the VAnin range extender network.

Q4. What should I do to exceed the Vanin extender network coverage?

Nothing to do, just you can place it in a ventilated, airy, cool, and optical location in your home. Also, keep it closer to the router.

In case you are trying Setup, use this link for further assistance ap.setup.

Techly Wall Plug Wireless Router 300N Wall Repeater2

Nowadays we cannot imagine a day without the internet. The Internet plays an important role in our day today life. In accordance with the need. we have a brand new product. Yes, your thoughts about our product based on the above description are right, Techly Wireless Router 300N is an all-new portable( wireless ) router – Wall Plug Wireless Router 300N Wall Repeater2. A router is a networking device that forwards data packets between computer network.

Let us understand this by a very general example, suppose you search for www.google.com in your web browser then this will be a request which will be sent from your system to the google`s server to serve that webpage, now your request which is nothing but a stream of packets don`t just go the google`s server straightaway they go through a series of networking devices known as a router which accepts this packets and forwards them to correct path and hence it reaches to the destination server.

Our product is a portable and wireless router which provides a wide range of internet to a particular distance with strong wifi field. Now let us get to know about the setup and installation, types of modes, updation of firmware, methods to reset the router, and few issues of it.

FEATURES OF TECHLY 300N WALL REPEATER 2:

Standard: IEEE 802.11b / g / n, IEEE 802.3, IEEE 802.3u

  • Supports Router, Client, Bridge, Repeater (Range etxtender), AP mode
  • Provides 1-port 10 / 100Mbps Auto-Negotiation Ethernet WAN
  • QoS assures the quality of VoIP and multimedia stream
  • Wireless N speed up to 300Mbps and backward compatible with 802.11b / g
  • Frequency range: 2.412-2.472GHz
  • Supports SSID broadcast control, WMM and WMM-APSD
  • Supports 64/128/152-bit WEP, in accordance with 128-bit WPA (TKIP / AES),
  • The user interface supports free software update via WEB
  • Supports configuration file backup and restore
  • Setup Wizard and easily

TECHLY 300N SETUP AND INSTALLATION

  1. Firstly, decide where to place the router
  2. Connect to the Internet
    Attach the router to a cable – or choose a mesh router
    Check the router’s LED lights
    Test the connection with a device
  3. Configure the wireless router gateway.
  4. Connect gateway to router
  5. Use ap.setup or 192.168.10.1 on web dashboard
  6. Create a username and password
  7. Update the router’s firmware
  8. Create a Wi-Fi password
  9. Use auto-configuration tools where possible
  10. Finally, setup security

Techly 300N repeater modes :

ACCESS POINT MODE :

Access Point mode is when you want to connect the router up to an Internet source via a cable. This differs from the default method of connecting to the Internet; while the default method plugs directly into the Internet, using Access Point mode allows you to connect it via cable to, perhaps, another router. Using Access Point mode is ideal if you want to extend the WiFi range, but the router you’re using to extend it isn’t too far away from the main central router.

The cable will ensure you get the best possible speeds between the access point and the central hub, and you don’t have to worry about anything interfering with a WiFi signal. This is a great choice if you want to extend your home connection past something like a solid wall that’s blocking WiFi connections. Simply connect the router to the central hub, place it on the other side of the wall, and put it in access point mode.

REPEATER MODE :

Repeater mode is not too different; it performs the same role as Access Point mode, but the key is that it talks over WiFi instead. As such, this doesn’t get around obstacles as well as an access point does. Moreover, while an access point can be put in front of an obstacle, a repeater will need to be angled around it. However, the benefit of repeaters is that they don’t need a cable to connect to the central hub.

This means if the problem with your WiFi is purely tied to distance, a repeater can be placed at the halfway point to help extend your signal. If you’re signed up to an ISP that allows you access to a public-broadcast WiFi signal, you can use a router in repeater mode to pick up the signal and beam it to your household. This is particularly useful if your Internet goes down for some reason!

HOW TO RESET A TECHLY 300N ROUTER :

Follow the short process below for the best possible chance of improving the situation. Rebooting this way works with most makes and models of routers and modems.

  1. First of all, unplug the techly wireless router 300n and the modem. If you have other managed network hardware, such as network switches, unplug that hardware. Unmanaged devices can be left powered on, but use your judgment if you think these might be part of the problem.
  2. Wait at least 30 seconds. This time lets the devices cool down and indicates to your ISP, computers, and other devices that the router and modem are offline. This step may not be necessary if you know what the problem is with the connection. Restart the router and modem when you don’t know what’s wrong.
  3. Plug in the modem. If it doesn’t power on in the first few seconds, press the Power button. The modem is the device that your connection to the internet attaches to. For example, with cable-based internet service, the modem attaches to the coax cable from outside the home
  4. NOTE:Wait at least 60 seconds. During this time, the modem authenticates with your ISP and is assigned a public IP address.
  5. Plug in the router. Some routers may require that you press a Power button. On a combination modem-router, skip this and the next step. The software in that device initiates things in the proper order. The router is physically connected to the modem, so the device next to the modem is probably the router. Not all routers have an antenna, but many do, so if you see one or more of those, that’s probably the router.
  6. Wait at least 2 minutes. This gives the router time to boot up. It also gives computers, smartphones, and other devices that use the network time to get new private IP addresses assigned by the DHCP service in the router.
    If you turned off the power for switches or other network hardware, power those back on. Then, wait a minute. If you have several devices, power them on from the outside-in, based on your network map.
  7. Lastly, when the router and modem restart, test to see if the problem went away.

LED status on Techly repeater

Those lights on your router or cable modem aren’t just there for show. Techly repeater lights convey information about the status of your internet connection. Here’s how you can use them to troubleshoot problems. You may have noticed that your router and modem have, like, a ton of constantly blinking lights on them. Actually, I was being facetious saying “you may have noticed” because these lights are totally obvious. What isn’t obvious is what the hell the purpose of these lights is. When you lose the internet, here’s how you can use some of them to troubleshoot the problem.

On a router:

Most routers have a single light dedicated solely to the status of the internet connection. This light is often labeled as the Internet, WAN, or marked with a symbol of a globe or a satellite flying around a globe. In most cases, this light needs to be lit solid (white, green, or amber) or flashing to show that internet activity is happening. But if it’s off or red in color, then it’s time to check to make sure that the network cable that connects the router’s WAN (Internet) port (often on the back of the router) to the modem is plugged in and not broken in any way. If the cable is all fine, then it’s time to check your cable or DSL modem’s light.


On a modem (or a router/modem combo)

Similar to routers, most modems (both Cable and DSL) have a light dedicated to the broadband connection. This light is often labeled as Online, Cable, Sync, or Signal and usually has a symbol similar to the internet light on a router as mentioned above. Under normal conditions, this light should be solid green (or amber).

If it’s off, red, or flashing constantly (it’s OK if it flashes for a short time, like less than a minute, after a reboot) then check to make sure the service cable, either the phone line (DSL) or the coaxial cable (cable internet) is securely plugged in and not broken. If the cable is fine, then you should call the service provider (and tell them about the status of the light) because there’s nothing you can do on your own at that point to fix the problem

ISSUES IN TECHLY ROUTER :

  • Mismatched Wi-Fi Security Settings.
  • MAC Address Restrictions.
  • Loose or Disconnected Cables.
  • Overheating or Overloading.
  • Wireless Signal Limitations.
  • Defective or Outdated Hardware or Firmware.

WAYS TO SOLVE COMMON TECHLY 300N ROUTER PROBLEMS :

  • Update your router’s firmware. The reason to do this step is twofold.
  • Look for interferences. Routers often compete for airwaves with other household devices.
  • Change channels.
  • Put the kids and guests on their own network and enable QoS.
  • Get an updated router.
  • Try a Mesh network.
  • Check your security.
  • Change location.

TECHLY 300N ROUTER ADVANTAGES :

1. Connection:

The primary function of a router is to share a single network connection among different machines. Using these multiple users can be connected to the internet so that overall productivity can be increased. Besides that routers also functions to connect different network architectures and medias.

2. Security:

Having a router is surely a first step towards securing a network connection. Because connecting to the internet directly with a modem exposes your PC to a variety of security threats. Therefore routers can be used intermediately between 2 networks so that the environment is secure to some extent. While this is not a replacement for an antivirus or a firewall, certainly it is worthy.

3. Dynamic Routing:

For facilitating internetwork communication, the router uses dynamic routing techniques. Dynamic routing determines the best path available for the internetwork. And also it creates broadcast and collision domains. This can overall reduce network traffic.

4. NAT Usage:

Routers take use of Network Address Translation (NAT). With NAT routers can share the connection by using a single public IP address and share of UDP ports. Moreover, it is almost impossible for large companies to connect to the internet without NAT.

TECHLY 300N ROUTER DISADVANTAGES :

1. Speed:

Unlike repeaters and bridges, routers do not just read 2 layers of information. It completely analyzes data from the physical to the network layer. As a result, the connection could become slow. Moreover using routers, multiple computers can share the network for which the router undergoes a situation known as ” Connection Wait ”. This possibly slows the connection more.

2. Cost:

Routers are costly more than any other networking device. This includes a hub, bridge, and security. Therefore routers are not always the greatest option in terms of cost.

3. Reliability:

Not all the time routers are reliable. Still some modern devices use 2.4GHz spectrum which frequently gets disconnected. Moreover, most at times these types of disconnections are experienced by the people residing in flats and apartments.

5. Implementation:

A typical router requires lots of initial configurations and NAT to setup. And also even for the simplest connection, there should be a private IP address assigned. If there are more services enabled it needs more configurations as well. This in essence creates more complications in the setup.

Spectrum Wi-Fi Router

Spectrum Wi-Fi Router

The brand new Spectrum Wi-Fi router has dual-band technology which gives you top-notch service. This router has the newest 802.11 ac wireless technology which gives you access to high-speed network connections with ease. It has all the updated technology one can expect from a good Wi-Fi router. The dual-band technology helps to deliver smooth Wi-Fi connections and has a broader range so that you can enjoy its network from every corner of your home. The ultra-speed network of this device is ideal for streaming online games, HD videos, uploading large files, and other heavy tasks. It has security and encryption features also, which uses WPA2 wireless encryption and an SPI firewall that defends viruses, malware, and hackers.

How to Install Spectrum Wi-Fi Router?

The Spectrum Wi-Fi router delivers incredible Wi-Fi network speed in any large premises, perfect for any residence, office, hotel, and apartment. But before using this, you need to install it first. Here are the following steps for the Spectrum router setup process,

  • First, check the package for the required contents like power adapter, power cord, ethernet cable, wifi router manual, and the router itself.
  • Put the router in a place from where it could be easy to catch the network from any corner of the premises.
  • Then connect the power adapter with your router and switch on the router.
  • After that search for your router connection in any of your devices, i.g. Mobile, laptop, pc, tablet, etc.
  • Select the Wi-Fi router’s network by clicking from your available Wi-Fi network list.
  • Put the router network password by clicking on the label.

Now that the installation process is complete and your device is connected to the Wi-Fi network, you have to go to the login page of the Spectrum Wi-Fi router and gain access. If you have any doubts about the login page, here are the steps.

login page of the Spectrum Wi-Fi router

  • First, check whether your device is properly connected to the router’s network.
  • Then, open the web browser on your device and click on the URL bar.
  • After that, type the Spectrum router IP address, i.e. http://192.168.1.1/ and http://192.168.0.1/ or you can use the web address which is, http://ap.setup
  • Now put your credentials, like username, password or you can choose the default login option and easily log in to the account. The default username and password is, Username: admin Password: admin
  • After filling in the information click “login”. Now the login process is complete.

How to Change the Default Username and Password?

If someone wants to change the default username and password, it can be done very easily. Here are the following guidelines for the process,

  • Repeat the previous steps for login and go to the login page.
  • In the dialogue box enter your new preferred network name and password and click “apply”. It will change to your preferred network name and password.

How to Setup the Spectrum Router via Web Browser?

Setting up the Wi-Fi router is the first and foremost thing you have to do. The following guidelines are,

  • First, switch on the Wi-Fi router. Check the led indicator attached to it, if it is green, it means the connection is good. Then go to the login page insert the router IP address, username, and password.
  • After that, select the security and frequency band provided in the option.
  • Select the internet connection type and channel bandwidth and click “apply”. Your router is all set to go.

Steps for Troubleshooting the Spectrum WiFi Router

Sometimes the Wi-Fi router may not work properly, although these are very rare. If you come across such issues, here are the steps for troubleshooting,

  • It happens that sometimes the network cannot connect to your devices like your phone, laptop, pc, etc. To connect with the Wi-Fi, check if the Wi-Fi signal is turned on; otherwise simply restart your device.
  • Sometimes the internet connection can be slow, try the Spectrum self- install troubleshooting, it will resolve the errors by rebooting your router. Also you can try to reposition the router where it has fewer barriers or keep it in the center.
  • You should always check if a new spectrum router firmware update is available.
  • If there is any fault in the setup of the Spectrum Wi-Fi router setting, you can simply just reset.

Manual of the Spectrum Wi-Fi Router

The device comes with a Spectrum Wi-Fi router manual book. It contains all the answers for the basic queries, e.g. “How to set up the Spectrum router?”, “How to access the login page?’’, “Also How to find the default IP address?’’, “How to reset the router?’’, etc. Can find all the detailed specifications in this manual book.

Spectrum Wi-Fi Router Review

The Spectrum Wireless router is exceptionally an impressive device, it provides a high-class wifi network, making your work pace smooth and efficient without any fuss. For professionals whose works are solely dependent on the Internet, this is the perfect device for them and it also comes at a reasonable price. Besides having the gigabit ethernet, USB port, it has everything one can expect from a wireless router. This device also comes with the latest wireless standards like 5GHz: IEEE 802.11ac 2.0, 802.11n, 802.11a; 2.4GHz: IEEE 802.11n, 802.11g, 802.11b. It provides the security WEP, WPA, WPA2 to protect your device from the virus and malware. It’s a magnificent entry-level wireless router that allows you to save a lot of your buck among wireless routers.

FAQs

How to access the Spectrum router login page?

If the spectrum router login is not working, you need to verify the router IP address. Still not working then clean the history of the browser or use another web browser.

What should I do if my spectrum Wi-Fi router is not working?

First, switch off then unplug the modem from the router. Again plugin and power on the router.

How do I reset the spectrum router?

To reset the Wi-Fi device, press the reset button, and hold it for 10 seconds, and release it. The device will get reset.

Can I expand the range of the Spectrum wireless router?

To expand the range of the router, you need an extender to connect. You can use the spectrum router WPS button to connect the extender.

How do I access the router without the app?

To access the spectrum wireless router without the app, log in through the web browser. For this, you will need the spectrum router’s IP address.

setup wavlink aerial wl-wn579g3 ac1200 repeater

Wavlink AC1200 Wireless Dual-band Extender is an excellent option for anyone who is looking for an Extender with lots of features and a compact design for users. This budget Extender improves your wireless network strength and eliminates all the dead zones in and around your home. It comes with different modes as AP Mode and Repeater Mode. It comes with easy installation and latest technologies such as Beamforming technology, Heat dissipation design, Smart indicators, Ultra-Fast Data transfer, and High-gain adjustable antennas. Wavlink uses high power to keep the Wi-Fi Strength Full. It comes with Wavlink documentation and Wavlink company Warranty. We can say it’s a future proof extender with all these features. Let’s start the Wavlink WL-WN579G3 AC1200 Repeater setup-

Wavlink AC-1200 Repeater Setup with WPS

Wavlink wn579g3 repeaters are known for easy installations and different ways to setup. Now we discuss the Wavlink Ac1200 setup using the WPS button-

  • Unbox your Wavlink aerial repeater from the box and read instructions from the Quick guide.
  • Plug your repeater into any Electrical outlet.
  • Note: Choose an ideal place for Extender which is the midpoint of the dead zone of the Wi-Fi range and router.
  • Check the router functioning and check whether your router is supported by your repeater.
  • Reposition your antennas which help to get an Extra boost in Wireless range.
  • Take a close look at your quick guide and locate the WPS button.
  • Locate the WPS button on your router as well.
  • Switch ‘ON’ the Extender.
  • Move the switch in the Extender switch to “repeater” in the “Access Point/Repeater/Router” switch.
  • Press the WPS button which can be located in your Wavlink aerial wn579g3.
  • After successfully following the above steps, press the WPS button on your Home router.
  • If the WPS button not located on your home router, check whether the router supports WPS technology or not.
  • To know if your connection is successful, check a blue LED stops blinking and stays on.
  • Now please relocate your wn579g3 aerial ac1200 repeater to the proper spot to achieve maximum efficiency.

Wavlink AC1200 WL-WN579G3 SETUP with Web browser

Wavlink AC1200 setup can be done using the web browser. You can use any web browser to setup your Universal wi-fi repeater. Still, the company recommends Google Chrome and Mozilla Firefox which offers the best performance needed for the website.

  • Please connect your wl-wn579 aerial repeater to any standard electrical outlet.
  • Turn ‘ON’ both router and extender.
  • Check whether the Power LED is on which implies its getting power.
  • Toggle the switch to the repeater on your Extender.
  • Pick any device(computer/laptop/phone) and connect to the repeater default name.
  • Connect to the Extender WI-Fi Network name that begins with “Wireless N” for 2.4GHz and “Wireless AC” for 5GHz.
  • Open the stated browser and enter wifi.wavlink.com or 192.168.10.1 to enter the Extender management online page.
  • Enter the page with default username and password ( Both username and password are “admin”)
  • Click the wizard option from the page and go for a repeater.
  • Pick the correct router you needed to connect with the extender, enter the password.
  • Please wait a few minutes to complete the setup.
  • You can use AC1200 WL-WN579G3 in any part of your home with good stability.

Wavlink AC1200 WL-WN579G3 SETUP ACCESS POINT

As we discussed above section, WN579G3 can be used in different modes such as Access Point Mode and Extender Mode. This time we can walk you through Wavlink AC-1200 Repeater Access Point setup. We can check how to setup your Access point for every device in all major Operating systems.

  • Plug your Aerial AC1200 repeater in a suitable electrical outlet.
  • This part helps you to achieve maximum coverage, reposition your external antennas.
  • Turn ‘ON’ the wn579g3 Extender to use your it as an access point.
  • Locate the sliding switching on it with the names of all the modes.
  • Slide the switch towards Access point.
  • Look for the LAN port switch on your Extender (For assistance you can look into the quick guide).
  • Insert your ethernet cable into this port from your router’s LAN port.
  • Open any web browser from the device you connected to Wav-link “wireless-N” or “Wireless AC” network name.
  • Open URL wifi.wavlink.com or 192.168.10.1 to access the website for the management of your Extender.
  • Access the website via default username and password “admin”
  • Enter the wizard section to enter into Access point mode.
  • Create an SSID and password and wait a few minutes until the bar reaches full.
  • When reaches full, You can use your aerial ac1200 as an Access point.

How to update Wavlink AC1200 Firmare Update?

  • First of all, we need to check whether there is any update for it.
  • Open any web browser on the device connected to the ac1200.
  • Enter either URL wifi.wavlink.com or 192.168.10.1 in the browser.
  • Go to the settings field.
  • Press Update option on the website and check online options now.
  • If the update appears, follow the prompts and install the ac1200 firmware update.
  • The file will be downloaded locally.
  • Extract the file and paste it.
  • Upload the update file from the browser.
  • Please wait a few seconds to start the Firmware update of your Aerial WL-WN579G3.

How to Reset Wavlink AC1200 WL-WN579G3?

We can reset the Wavlink repeater to begin from zero and erase all the errors that happened. There will be many problems such as a firmware problem or network problem. We can reset the ac1200 repeater and start from scratch again-

  • Pick any sharp object such as pin/pencil to insert into your reset hole on the ext.
  • Locate the Factory reset space on it.
  • Press the Factory reset button using a sharp object for around 10 seconds and release it after that.
  • You will see a blinking light while you are resetting the ac1200.
  • If restart begins, Extender is in now Factory reset.
  • Click here to download Wavlink WL-WN579G3 AC1200 Pdf Manual.

Setup Wavlink AC2100 WL-WN583A6 Wifi AP-Repeater-Router Aerial Max

Wavlink AC2100 WL-WN583A6 enables you to connect Blu-ray player, gaming console, streaming player and more to the internet. It improves wireless coverage in every WLAN networks. The repeater has internal amplifiers that send a strong wireless signal that can easily penetrate through any obstacle such as the wall. Thus, you have wall to wall network coverage. You can get a Wi-Fi signal in any room without worrying about the network coverage. All you have to do is plug it into the power socket and extend your Wi-Fi just by pressing the WPS button on your parent router or you can opt for the web browser setup. Let’s start the Wavlink AC2100 WL-WN583A6 setup process-

How to SetUp Wavlink AC2100 WL-WN583A6 as a repeater via wifi.wavlink.com | 192.168.0.1

  • To set up the Wavlink WL-WN583A6, you will simply have to follow some easy steps.
  • Plugin the extender to a power outlet and turn on the power.
  • Now for the connection, you can either do it wirelessly or through a cable.
  • For a wireless connection, you will have to switch on the Wi-Fi and find out the SSID of the product on the wireless device such as a laptop, smartphone, or tablet. Thereafter, connect the device to it. The default Wavlink network name for 2.4GHz is “Wireless N”, default network name for 5GHz is “Wireless AC”.
  • For connection using a cable, you need to connect the Ethernet cable to the laptop or PC and the LAN port of the AC2100 WL-WN583A6 aerial max repeater. Thereafter, you will be able to configure the device.
  • Open the web browser from your PC, laptop, or smartphone and type wifi.wavlink.com. You can also type 192.168.10.1. Admin if your default password.
  • On the page that opens, choose a region. To secure your network, it is better to create a new login password that is strong enough. For this, you can follow the rules given on the page.
  • Wavlink Aerial Max functions as the extender in the default mode. Advanced users can also choose AP or Router mode.

How to Set Up Wavlink AC2100 Mu-Mimo WL-WN583A6 repeater via WPS?

  • People looking to Setup Wavlink AC2100 WL-WN583A6 via WPS can easily do so with the help of the steps given below.
  • Press and hold on the Pair or WPS button present on the router. The duration of pressing and holding is different for every router, the minimum time is 2 seconds. If you have difficulty finding out the pairing process, you should refer to the ISP or router manufacturer.
  • Push and hold the WPS button of the wl-wn583a6 repeater for 6 seconds till you see the LED light blinking blue. Once the light turns solid, this indicates that the pairing is complete.

How to setup Wavlink AC2100 Mu-Mimo WL-WN583A6 Wireless Router?

In order to Setup Wavlink ac2100 as a router, you will need to connect the ethernet cable coming from your Internet Service Provider(ISP) into the WAN port on your device. Now connect your Wavlink ac2100 either wirelessly to your computer or laptop by connecting your laptop or cell phone to “Wireless N” or “Wireless AC” in your Wi-Fi list. In case you want to opt for an Ethernet connection then connect Ethernet between LAN port on wavlink Aerial Max WL-WN583A6 ac2100 router to your computer. Let’s start the setup-

  • Open a browser(google, firefox, safari) on the device, that is connected to your router.
  • In the URL type wifi.wavlink.com or 192.168.10.1. In case Wavlink aerial max router login setup page doesn’t come up type ap.setup.
  • On the AC2100 Mu-mimo router setup page create your account and create the SSID and PASSWORD of your router.
  • Once all the on-screen instructions are completed you will see the SSID you created in your Wi-Fi list
  • Connect your different devices now with the new network you created.

How to Configure AC2100 Mu-Mimo WL-WN583A6 as Access Point?

Connect an Ethernet cable between Lan port on your Wav-link AC2100 to the LAN port on your parent router. Now you can connect any of your devices like computer/cell phone to the AC2100 Mu-Mimo wi-fi network name which is “Wireless N” or “Wireless AC” in your wi-fi list. Let’s Start the Mu-Mimo Aerial Max AC2100 setup-

  • Open an updated browser and type wifi.wavlink.com or 192.168.10.1 in the URL.
  • Select the mode as “access point” and hit next.
  • Create an SSID and Password for the new Access point.
  • Follow the on-screen instructions and complete the setup.

FAQ

How to Update the Firmware of Wavlink AC2100 WL-WN583A6?

  • At times, you might have to update the firmware to make sure your device functions efficiently. To do this, you can take the help of the steps enumerated below.
  • Download the updated firmware file from the Wavlink website.
  • Now, from the file you downloaded, you will have to extract the firmware.
  • Go to the web browser and log in to wifi.wavlink.com or type 192.168.10.1. Thereafter, select ‘Setup’ and then choose ‘Upgrade Firmware’.
  • Click on the Choose File/Browse option to find the firmware file.
  • Lastly, click on ‘Apply’ and wait for the upgrading process to be complete.
  • If you upgrade the firmware, it will help in fixing the bugs of your device. At times, the upgrade might also contain new features and will enhance the product function. However, a wrong update might damage your product. Hence, you should contact the support team to know the update and security process.

How to Reset Wavlink AC2100 aerial max Extender?

Like every wireless router, this too has a reset function. To reset the router, you just need to press and hold the reset button or the hole with a clip for about 10 seconds. Make sure that you do not power off the router while it is resetting. Restoring the device means, it is going to clean the configuration parameters and the internet will be disconnected. Hence, you should back up the existing configuration.

Rockspace Mesh Wi-Fi System

Rockspace Mesh Wi-Fi System

The Wi-Fi mesh system is being manufactured by the “Shenzhen RenQing Excellent Technology Co. Ltd” company based in China. The product (Item Model Number – RSD0610) got launched back in August 2019. The item sells at www.amazon.com (ASIN – B07V38NGRC) for a cheaper price segment and has not been discontinued by the producer. The brand provides a warranty of 1 Year, regarding any damage (both internal and external) of the device which can be claimed by registering your model online. After a thorough inspection, the Whole Home & Mesh Wi-Fi System Department awarded a rank of #114 to the Rockspace router. The consumers were pleased as well, their reaction and reviews resulted in a 4.3-star rating out of 5 at the buying link. To know more about the Wi-Fi system, visit their official website and check out your model.

Structural Description of the Home Wi-Fi system by Rockspace.

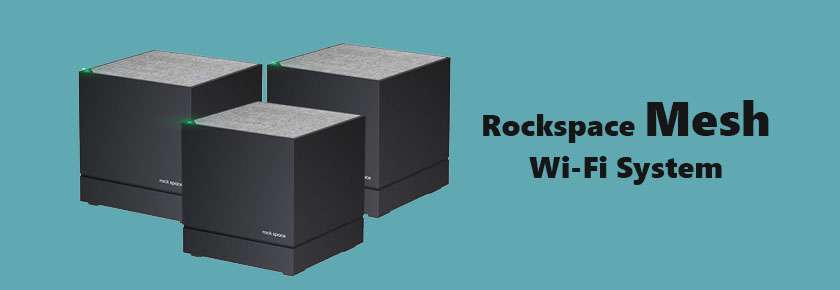
The Rockspace router weighs around 3.52 pounds and consists of a 4 * 4 * 4 inches dimension setup. The body of the gadget is box-shaped and is made of hard fibre material. They have a matt finish on the panel of the product alongside a greyish texture at the top. A LED light system is constructed at the top at a corner side for indication of any action that the user carries out. At the bottom 4 adjustment lifters are created for helping the Rockspace provide grip at its placement area. Similarly, the connecting ports are attached beneath them. They have an AC power source port, 1 LAN port and 1 WAN port, a reset button is also provided at the end of the ports. All in all, the device is well made and is quite reliable, even if it falls from a medium it won’t affect the internal system. Leave a message for the customer service agent to answer, if you have any at the official site.Explore re.rockspace.local

Unboxing the Whole Home Wi-Fi system by Rockspace.

As the package is big, it requires at least a month time to reach its destination, if being shipped outside the US. The import and shipping charges are extra which are being cut at the time of delivery. The company is huge, so they have many outlets worldwide but what they lack is warehouses, so the delivery stock may be interrupted a few times. Opening up the white panel box, you will lay hands on another box which is black in colour. Inside that is first kept the 3 Rockspace Wi-Fi routers, each in separate boxes. Beneath that is again kept 3 power adapters (Slow charging – 5V) in 3 separate boxes along with 2 white Ethernet cables. The manual and guide are kept at last for the user to follow and understand the instructions properly. Keep the bill documents safe is the only way to register your product at the official website and claim a warranty from there. If anything, other than is missing from the box, file a complaint at the Amazon delivery service and tell them about the theft.

Features of Rockspace RSD0601 Wi-Fi mesh system.

  • The modern Wi-Fi system has a wireless connectivity standard of 802.11 ac. The internal antennas provide a data transfer speed of 1200 Mbps. The Rockspace can be controlled by both app and browser, which makes it even more buyable. The built-in firewall systems follow the security protocol of WPA2-PSK. This makes it even more secure, as this feature prevents the system from getting hacked from anywhere.
  • The ground coverage of this mesh system is 6000 square feet, which is huge for any normal house, even with 2 or 3 upper floors. Using this means, you will have no space in your home left where the Wi-Fi couldn’t reach. The signal remains strong and uninterrupted at every point, from your bedroom to living space.
  • The Dual-band system allows every daily user to choose between 2.4 GHz and 5 GHz network bandwidth. You can connect more than 90 devices on the server and even after that enjoy Full HD videos and play high-end games without any lag or stutter. The Rockspace Wi-Fi uses advanced technology which helps the user make the router isolated once they throw a houseful party.
  • Quick properties such as seamless roaming and single SSID is pretty common these days. This makes sure that the connection remains stable, fast and spreads equally among all active devices in the house. Also, enable the QoS functionality in the app, if you are a gamer. Doing this enhances the speed massively and smoothens the game frame settings.
  • You can also limit certain devices from using the server at times, from the app. Prioritize those smart appliances, close the unwanted applications to experience a soothing mainframe in your system. Restrict your kids from seeing un-required sites with the help of parental control. Block sites, Internet service and set a timer on their device usage through the RS app to let them stay under your control.

Installing the Rockspace Wi-Fi system and controlling them with the RS app.

  1. Place the router in a fixed position and provide it with a stable power source. As soon as you do that, you will see a green light flashing over the top. Now, download the latest RS app on your Android or IOS smartphone and install it. Create an account or Sign-in to your old account via the given Email ID and Password.
  2. After you have logged in successfully, tap onto the “Add Device” option and attach your device by following the on-screen commands that follow next. As soon as the Wi-Fi page opens, you can choose between the 2 displayed network bandwidths. The names will be “WiFi Extender 2.4G” and “WiFi Extender 5G” showing on the list. Tap anyone you prefer and type in the Wi-Fi password correctly on it. The data is shared in the device manual and on the bottom of the router as well.
  3. Once you have finished configuring the Internet service, you can now name your Rockspace and even change the default password on it. Customize the app accordingly and start using it. If you have a bigger house, try using the repeaters as well. Simple charge them up and place them nearby the main router itself. Once it is on, the signal will be visible online and you can sync them together through the app.
  4. The option to add an extender is displayed at the bottom of the RS interface. After they are done connecting, change the position of the extender to a different place to avoid any left-over dead zones in your house. In this way, you can add multiple Rockspace repeaters to expand the ground cover to the furthest location. Watch the videos at the purchasing site, in case you find these article instructions difficult.

FAQS and Troubleshooting.

How to update the firmware version on the RS Wi-Fi App?

To refresh the product on the application, you simply need to ensure that your keen gadget stays associated with the Internet constantly. On the off chance that it does, the application mechanically upgrades itself during non-utilization hours. Indeed, you can by and by investigate that too, by visiting the “About” part of the application and minding its new form. An “Update Firmware” choice will be shown on the screen (If required), tap that and the application will introduce the most recent form and restart itself. (Note: Security patches are moved by the organization once after at regular intervals of 3 months)

How to factory reset or restart the Rockspace mesh router and extender?

To restart the gadget, essentially plug out the gadget from its fitting point or press the restart choice accessible on the RS interface. The gadget will continue working once the force is back on, a green light will demonstrate something similar. Then again, to do a total industrial factory reset, press the reset button and hold it for 7 seconds. The reset pointer will squint a “Red” light once and the Rockspace will fall back to its default settings.
Try not to hold it for a really long time, as the stunt doesn’t work then, at that point, and the router shuts down consequently. You need to design and redo your settings newly as your past personalization is deleted from the server. Sign in freshly all along and associate with the organization once more. Do the same on the extenders as well to put them back to their default settings. (Note: If the router is being reset, the extenders will automatically reset too as they are being connected to a similar network altogether. This is fully opposite in case of the extender being reset).

How to solve Rockspace router-modem connectivity issues?

The Rockspace can likewise be utilized regardless of whether there isn’t a modem accessible at your home. The ISP that furnishes you with the web administration conveys an Ethernet link at your home for the LAN association. Supplement it straightforwardly into the switch in the WAN port and begin utilizing the Internet whenever you have arranged it. The RS comes up short on the bridge mode system, so attempt and utilize a Double NAT framework to interface an extender or repeater of the current brand.

How to solve the Ethernet cable connection problem on the Rockspace AC1200 router system?

Each Rockspace goes about as a router and an extender, there isn’t anything as a primary/secondary router and repeaters thusly. Same ports and force usefulness is being given on the Rockspace framework. Presently, assuming somebody needs to associate the lattice framework with just Ethernet links (Ethernet backhaul framework), they can do that. They should simply get a couple of additional Ethernet links for the LAN association. When the prime RS is associated and fit, interface the primary Sub-RS by joining the yellow links (LAN 2 – LAN 1). Rehash something very similar between Sub-RS 1 and Sub-RS 2. Along these lines, they are totally interconnected and will actually want to convey web administration at a few focuses. Doing this doesn’t need some other association remotely, each goes about as a different switch itself.

How to solve the app functionality issue on the smart RS app?

As the application is as of late dispatched, numerous clients have been whining about the issue that the application out of nowhere quits working or gets frozen for quite a while. This occurs because of many reasons, for example, individuals probably won’t have been utilizing the most recent form. The beta form was the first since dispatch, however from that point onward, the organization pushed an update for the most up to date Android and IOS telephones. It cleared and fixed every one of the bugs and infection hacking inconveniences from the framework. If it’s not too much trouble, guarantee that you are utilizing the right and the most recent application, download it from the authority site itself to get the first one. To take care of the frozen issue, leave the application and eliminate it from your new applications. Open it new from the beginning and it will turn out great, additionally, a restart of your versatile can help as well.

Slow Internet speed detected on the usage of Rockspace router?

Because of much traffic close to your clogged home area, the Rockspaces’s speed diminishes with time. Inquire as to whether you are an everyday client in such a case. This isn’t the switch’s concern really, many web servers crash at a similar spot because of which this issue is noticed. Regardless in the event that you purchase a greater brand switch or extender with heaps of radio wires the issue will emerge if your territory has various clients. Well in the event of extremely low speed, you can generally restart the framework subsequent to furnishing it with a digit of rest, this for the most part helps the exhibition of the RS framework. This broadens the Wi-Fi life and improves a touch of speed too. To upgrade the RS framework visit the “System Settings” window and go to the “Wi-Fi Interference” tab. Tap on “Optimize Wi-Fi” and you will actually want to alter the necessary settings all alone.

How to find a Wi-Fi account password on the RS app server?

The Wi-Fi secret phrase is imprinted on each Rockspace router and extender’s base side, beneath the mounting. All things considered, you can likewise visit the “Wi-Fi Settings” window on the RS application and you can see your secret phrase in the “Security” segment. On the off chance that you have modified that, the furthest down the line secret phrase will likewise show there. (Note: Your secret word ought to be as indicated by frameworks decision, which ought to incorporate 8 characters, numbers, upper-lower case letters). Following this configuration, your secret key will be solid, not handily hacked and surprisingly acknowledged by the framework.

How to reset the Wi-Fi password on the RS smart app?

To reset the secret passcode from an external perspective, tap on the “Forgot Password” option and give in the dynamic email ID that you have utilized at the hour of sign in. Type in the confirmation code effectively that is being sent on your ID into the application and get an opportunity to re-make your new secret key once more. However, in case you are signed in as of now, visit the “My Account” window and go to the “Change Password” tab. Snap-on reset secret word and follow the means as needs are.

How to solve the Parental control feature problems on the RS app?

To enact parental control, remember to record the site name or address in the right configuration. Missteps, for example, spaces or exceptional characters are to stay away from while entering the ideal prerequisites. Presently, here and there those particular locales are perused or gotten to on the versatile, even in the wake of obstructing them. To prevent that from occurring, clear the perusing history and information for all occasions, clear bookmarks also. Doing this in each program prevents you from getting to the site totally all around.

Reasons to buy the Rockspace router plus extender.

  • The Rockspace router series is quite reliable and inexpensive at the same time. Looking at the quality it provides, the device has a lot of fans and trustable service too. 2 repeaters come in for free to expand the network even after maintaining the same speed throughout.
  • The company sources are very responsive, they will help you in every way possible if any damage happens to the product. There is a 15-day return policy for the device, if anything happens to it during delivery or this time period, then you can exchange the item with a new one instantly or get the money back.
  • The seamless speed service including the Dual-Band system makes the device even more choose-able in this era of single targeted devices. The body frame is strongly made so that if it falls it doesn’t affect the internal antennas and chip.
  • Quick features include ultra-fast web speed, parental controls methods, the latest generation WPA security system, and advanced extendable ground coverage suffices the owner’s requirement.

Review of Rockspace wide coverage Router Extender device.

In the time of a pricy market, individuals are consistently looking for a dependable item that is less in cost and gives a tip-top execution as per the client’s necessities. In any case, each time this may not be conceivable, however this time you are fortunate in light of the fact that today I will present the Rockspace AC1200 Dual-Band Wi-Fi Mesh System. The entire load accompanies 3 bits of switches, alongside discrete chargers and links. The RS gives an information move pace of 1200 Mbps which is displayable in the framework dashboard.
You can see the few gadgets that are associated with the application, oversee different destinations on parental control mode, see the every day utilization report and give visitor access. Additionally, the gadget can be handily fit in different areas, for example, divider wardrobe, top shelf cabinets and a lot more because of its regular shape. With such countless components and characteristics that remember for one framework, the most recent gen RS is highly adored across the nations. Well, if you are looking for something else to buy, have a glance at TP-Link Deco X20, Amazon eero 6, Google 4 PK, Linksys VLP01, Tenda MW3, Mercku M2, AZORES WIFI 6, Netgear Nighthawk, etc. as quick alternatives.

Rockspace AX1800 WiFi 6

Rockspace AX1800 WiFi 6

The Rockspace AX1800 WiFi 6 range extender provides blazing high wifi speed with a greater network and technology. It enables four times higher networking speed so that you get the ultra-fast speed and the Gigabit wireless ports that make this extender ideal for streaming and gaming. Moreover, the range extender comes with MU-MIMO technology that can simply deliver high network access to all the connected devices at the same time. Its higher efficiency allows the extender to connect to 30+ devices with a ten times faster speed than any standard Ethernet port. Therefore, its powerful and smart 3.0 USB ports allow sharing the storage space with wireless printers and other files of your network.

However, the Rockspace AX1800 WiFi 6 extender comes with Beamforming technology that provides unbeatable wireless coverage with the help of its four high gain antennas. Its high-range antennas simply boost the signal and access every corner of your house. Well, the wifi 6 range extender can attain coverage of 2500 square feet of area and ensure that you and your family receive the best wifi signal ever.

Astonishing Features of the Rockspace AX1800 WiFi 6 extender

As you know, the Rockspace wifi 6 extender is a dual-band extender and enables a large capacity of storage with a fast accessing internet signal range. Also, you can compare it with the previous generations of technology and will find that it is the most effective extender that deals with the response and access to many devices. However, it requires high-speed transmission for 4K video and large-scale video gaming. Here are the most effective features that prove the working capacity of the extender.

  • The Rockspace AX1800 WiFi 6 range extender supports ultra-fast wifi 6 technology that offers AX1800 of Gigabit speed and covers 1600 square feet of area without interrupting your entertainment zone. It is ideal for video streaming and web conferencing.
  • It provides a larger capacity of support with the MU-MIMO extender that improves the network utilization rate and simultaneously solves the problem of communication with 30+ wireless connected devices.
  • With the setup of the wifi 6 range extender, you get longer whole home wifi coverage. Also, it is furnished with dual 5dBi high range antennas that seamlessly cover long distances and a dual-core strong and powerful processor that is reliable for boosting the internet speed and moving anywhere around in your house without losing the connection.
  • Well, it is universally compatible with both wifi 5 and wifi 6 enabled devices. Just plug the Ethernet cable into the game consoles, repeaters, or routers and turn this extender into the access point.
  • Simply, the Rockspace wifi range extender is furnished with two WPS buttons. One is for 2.4 GHz and the other is for 5 GHz networking bands. You can choose any of the networking bands to extend the existing WLAN network to meet your personal requirements.

Therefore, these are the Rockspace AX1800 specs or features. By reading these features you get more familiar with the Rockspace extender.

Rockspace AX1800 WiFi6 Extender Setup

When you are setting up the Rockspace AX1800 extender for the first time, then you have to take care of every step that you will read in this article. Also, you need to make sure that you will not skip any step because it may fail you to access the network connection with the Rockspace wifi 6 extender. If you are trained in extender settings then you can skip these steps. Basically, it all starts with the Rockspace AX1800 installation.

Proceed with the PPPoE password and the username from the or the Genuine Rockspace AX1800 wifi 6 repeater
  • First of all, power on the button on the actual wifi range extender and then other wireless devices.
  • Hereafter connect the AX800 WiFi 6 range extender to the LAN port of the new wireless device to the WAN port of the WiFi6 extender via an Ethernet cable.
  • When you see the LED indicators of the LAN or WAN port turn solid after blinking for three seconds then process the PPPoE username and the password to the new wifi range extender.
  • Now you can unplug the wire of the WiFi6 range extender.
Make a connection of the New WiFi range extender to the internet.
  • Prominently. Power on the button of the new range extender.
  • Therefore, connect the LAN port into the modem and the WAN port into the new wifi range extender by using an Ethernet cable and the LED indicator of the WAN lights on.

This is the first method in which you make a connection of the AX1800 WiFi 6 extender with the new wifi range extender device.

Connect wifi enabled devices to the new wifi range extender

This is the second method in which you use the wifi-enabled devices such as a mobile device to the new wifi range extender by using the WiFi network name that is labeled on the bottom of the wifi range extender. As there is no wifi password set by default. The one more thing you can do to connect the device to the new range extender is to use a wired connection setup. In which the Rockspace AX1800 WiFi6 repeater connects the wired device to the LAN port of the wifi extender via an Ethernet cable. When the LED indicator lights up, the connection is successfully established.

Rockspace AX1800 WiFi6 repeater Setup for better internet access

This is the third method in which you will establish internet access with a wifi range extender. Let’s go through with these steps.

  • First of all, enter the IP address of the Rockspace AX1800 wifi range extender 192.168.1.1 into the location bar and press ‘start’ to proceed to the start page.
  • Now you have to enter the username (admin) and password (admin) into the password field to log into the web user interface.
  • Therefore, set up the time zone and the region and then tap on the ‘next button.
  • Hereafter, choose the connection type in which you have to choose from PPPoE, Dynamic IP Address, and Static IP Address.
  • Hence the wifi range extender detects the connection type automatically. You simply need to set the parameters and tap ‘next’.
  • Now you have to customize the settings of the wifi password and the SSID network name. If you want to hide the SSID then hide and then click on the Next button.
  • Hereafter, confirm the settings of the wifi network name and the password and then click next.
  • From there you can customize more functions. For that, you need to log into the web user management page again with the default IP address. Now you can customize the functions that you need on the page

Therefore these are the different methods to complete the procedure of the Rockspace AX1800 setup. To access the settings of the Rockspace AC1800 page, you need to walk through with the extender and the repeater setup.\

Rockspace AX1800 WiFi6 Troubleshooting Tips

For the Rockspace AX1800 WiFi 6 extender users who face some issues with the device or due to some technical issue, they failed to access the internet connection. So for those users, who are eagerly waiting for a wizard who helps you in solving the problem then you are reading the right article. Let’s get started without wasting time.

Why is Rockspace AX1800 not working accurately?

Try these steps to resolve your query.

  • First of all, you need to make sure that the LED power light of the AX1800 WiFi 6 extender is on.
  • Hereafter, push the Rockspace AX1800 reset button with the help of any sharp object.
  • Use a paper pin, nail, or your thumb to push the button for more than six seconds.
  • When you see the power LED turning solid then it means the AX1800 extender has been restored to the settings into default mode.
Why is Rockspace AX1800 not turning on?

The best way to deal with the problem is to check from the indication of the LED lights that exactly tell what’s the error with the device.

  • You can start from the power button, if it is off then push the on or off button of the AX1800 WiFi 6 extender.
  • When the LED light starts flashing red or orange, then the device is having a poor or weak internet connection. In that case, move your range extender closer to the modem device.
  • In case the client device is blinking red or orange LEDs than in that case. Move the client device to the AX1800 extender.
Why is Rockspace AX1800 not charging?

To charge the Rockspace AX1800 extender, you need to make sure that the power supply is properly supplying the electricity or working properly. Also, verify that the wall socket you are going to use to connect the extender is not damaged. Therefore, open the extender settings and then check the settings. Moreover, you can take technical help or get a new charger to charge your extender. Maybe the problem is with the charger.

What are the steps for the Rockspace AX1800 firmware update?

For the Rockspace AX1800 firmware download the update by walking through the below-mentioned steps.

  • Open the preferred safe and secure internet browser on your client’s device.
  • Enter re.rockspace.local into the address bar and press enter.
  • Now you are on the Rockspace AX1800 login page where you have to provide the username and the password details to get into the settings of the device.
  • After the login, the setup page opens, in which you need to click on the administration settings.
  • Under the administration option, you get the firmware update option for the AX1800 extender.
  • Hereafter, locate the file to get the latest firmware update of the Rockspace AX1800 WiFi6 extender into your client device.
  • Hence, tap on the install and it will take 3-4 minutes to upgrade the firmware of the AX1800 range extender.

However, if you face any issue other than these problems then refer to the Rockspace AX1800 manual.

Rockspace AX1800 review

The Rockspace AX1800 WiFi6 Repeater is the best for covering longer or wider areas. As it is equipped with 5dBi high gain antennas and I am surprised with its fast wifi speed. I live in an in-building where the internet service can’t reach, so I did the trick to use the Rockspace extender for my home connection. Also, it is installed in the outermost part of my home wall near the building. The setup of the extender is a five-finger exercise and it allows extending the internet service with two major methods. In case, if you get stuck at many installation steps then you can read the Rockspace AX1800 instruction manual. I would like to recommend to all those people who are looking for the best wifi range extender to cover the wider areas smoothly.

opticover new extender setup

As its name suggests Opticover extender is a Wi-Fi range and speed enhancer device comes up with impressive results. This device can be used wirelessly or with wire depends upon the user entirely. This tiny device can resolve any Wi-Fi problems without leaving any dead ends. It comes with Repeater mode/Access Point/Router. This small device supports speed upto 1200mbps which is something unimaginable. It gives you secured encryption hence provide a safe network for your data. The design of wall plugin Opticover wifi extender is very compatible and fits perfectly with wall decor. The external antenna ensures to provide a strong and stable network throughout. Like other extenders, it is also very easy to setup opticover extender and takes very little time to make it work.
So here are steps to setup this device-

Opticover Extender Setup Via WPS

  • Connect the Extender to power outlet next to the router and turn on the switch present on the extender. Make sure the opticover repeater should be on Repeater mode.
  • Press the WPS button of the router for few seconds till the light starts blinking.
  • Hold the WPS button on the Extender for about 6 seconds and release it when the light starts flashing.
  • When the blinking/flashing lights turns stable and solid it means the Extender is connected to the router and ready to use.
    Now you can relocate the Extender within the range of the network to remove dead zones. Select the network with _EXT and your router password to access it.

Opticover Extender Setup Via Web Browser

  • Plugin the Extender to electric supply and turn on the extender. Make sure to put it on Repeater mode and in the vicinity to the router.
  • Open Wi-Fi list on your phone or computer. Connect to default “WIRELESS-N” open network.
  • Open the browser on the connected device and enter ap.setup or 192.168.188.1 in the address bar.
  • On the next page Create a new password for further login and click on Start.
  • Select the router’s network and enter a password ( not the same password you just created) and then click Next.
  • Create a new SSID if you want to or keep it default. Click Next.
  • Now verify your given details and click Save. Now make sure LED should turn on solid and stable. This ensures your successful setup.

Opticover Extender confiuration As Access Point

  • Plugin your extender to the electric supply outlet and make sure it is connected properly and extender is On.
  • Slide the switch and turn on to Access Point and now plug in the Ethernet cable of the router to the LAN port of the opticover to connect both router and extender with each other.
  • Now connect to extenders default Wi-Fi network “WIRELESS-N” in Phone/PC Wi-Fi list.
  • Open browser in the connected device and type “ap.setup and 192.168.188.1” in the address bar and press Enter.
  • A page will open asking to create a password for future Login.
  • On the next window, Opticover Extender setup page will open Select Wizard -> Select Access Point.
  • Type old SSID, security type and a password
  • Now, wait for the progress bar to reach fully to update changes and reboot device.
  • After reconfiguring and rebooting Opticover Extender is now ready to work as Access Point. LED turns solid and stable. Open your Wi-Fi list connect your devices to the network entering the old password and now you can access high-speed internet with a stable connection.

FREQUENTLY ASKED QUESTIONS (FAQ’S)

I am unable to access opticover extender’s web management page. What should I do?

  • If you connected your computer wirelessly, make sure that you have correctly connected to the extender’s SSID.
  • Or else if you connected your computer via an Ethernet cable, please make sure that the cable is in the right position and connected properly.
  • Verify that “http://192.168.188. 1” is correctly entered in the address bar without any error and press Enter.
  • If the problem still exists then Reset the extender and try again.

Why doesn’t the LED light-up On opti cover after I completed the process?

  • While configuring it might be possible that you have entered an incorrect Wi-Fi password of your host Wi-Fi network.
  • Please Log in to the extender’s web management page to check the password and try again.
  • Make sure that the extender should be in the range of the router. Please place the extender in the vicinity to the router.

How do I Reset my opti-cover Extender?

  • Power On the extender, Use a sharp-pointed pin to press and hold the Reset button present on the extender until all LED turns on & off momentarily and then release the button.
loom wireless extender

loom wireless extender

Does your home network router signal not cover all of your home zones? Are you struggling with your wireless router’s poor connection issues? The internet-relevant task never can be done appropriately with the poor connection of the network. So, to stop all such errors, you have to put midway between your wireless router an annoying free-range extender. Currently, the loom wireless extender is in use and is mostly used by people to stop your routers from being never-ending annoying. To know all the Loom WiFi extender instructions especially regarding its setup, you have to only understand the user manual.

Fundamentally, the loom WiFi Extender Signal Booster expands your router signal range up to 2640sq.ft. If you are speculating regarding “How to do the Loom WiFi Extender setup?” then, single on touch or hold the WPS button on this range extender device. You can log in to this Loom range extender with its default IP address. With the IP address of this range extender, you can efficiently log in to this extender. Moreover, this IP is not used for login whether you can also use it for the setup of the range extender. Get the expandable details regarding this Loom extender from the below.

Loom WiFi extender signal booster Installation

Are thinking about installing this wireless range extender precisely but don’t know “How to install the Loom WIFi extender?”. You have to Emulate the below-mentioned points.

  • In the beginning, unbox the Loom WiFi range booster.
  • After this, kindly take the Loom WiFi extender signal booster user manual and its furthermore accessories that are present into its packaging box.
  • If all the instructions are understood by you through its manual then let’s install it.
  • Use the plug and play method to operate this wireless extender comfortably.
  • Plug this LOOM range extender into the free power strip/outlet and turn on the electrified power strip.
  • Now, in this order, you have to pair this extender with your router using the WPS button.
  • Hold the WPS button on both of their devices together that’s located on the gateway of your device.
  • Consequently, the wireless connection is established between your range extender when its signal lights start flashing.
  • Now, this Loom range extender is installed happily.

So, these are the terrific aforementioned steps for the Loom WiFi extender signal booster Installation. Emulate these steps to installing it correctly.

What do you need to connect to the loom WiFi Extender?

Here are some necessary things that are most important to connecting this wireless range extender internet. These are some required things:

  • SSID/WiFi network name
  • Router IP address
  • Network connection password
  • Log in details for the router settings
  • Computer or any other internet-enabled device, etc.

How Do I connect the Loom WiFi Extender signal booster/amplifier?

Here are some mentioned steps to connect this LOOM WiFi Booster with the internet. There are two methods to connect this range extender internet that is:

(i) loom wireless extender Setup using the WPS Method

Here are the following steps to connect your device to the internet by the WPS method.

  • To combine your system with the WPS method, firstly locate the WPS button on your Loom range extender as well as on your router gateway too.
  • If your existing router doesn’t have a WPS button, then you will have to use it instead from its configuration page.
  • Now, you have to press your router & extender the physical WPS button.
  • If it doesn’t have a WPS button then open a router configuration setup wizard page and use the software button.
  • In this way, once your Loom WiFi booster and router connect.
  • Verify the booster signal light and your router link light.
  • It should be flashing or lit up on your Loom WiFi range extender.
  • If your router and extender WPS button are both pressed at one time then your range extender units with your router 2.4Ghz and the 5Ghz band network.
  • Now, the range extender happily connects with your router network.
(ii) loom WiFi Extender signal booster Setup without WPS

Below mentioned steps are given to connect your Loom signal booster with the internet but without the WPS method. Following are the steps:

  • After the Loom WiFi extender installation, kindly open a web browser.
  • Ensure that your computer connects with a pretty good internet connection.
  • Login to the WiFi range extender and go on a setup wizard page.
  • Through its setup page, you will have to move on to the wireless network settings.
  • Choose the device SSID (network name) and password.
  • Change the settings accordingly and save it.

Connect the loom WiFi range extender internet with your devices?

Now, after connecting your range extender with the router internet. You have to connect this device to your devices. So, let’s follow these below-given steps.

  • Launch in your computer system wireless settings.
  • Here the network name will be presented on your desktop.
  • Simply, insert your device name, if it is prompting, otherwise, enter your existing router WiFi password in the password field.
  • In this way, you attach your all internet-enabled devices with its network.
  • Eventually, you have to enjoy its well-joined internet connection.

Have any correct methods to log in to the loom WiFi range extender?

Yes, you can easily log in to the Loom range extender with the browser and with the app. Following are the steps to log in to it.

(i) loom wireless extender Login With the web browser
  • Type in the address bar of the web browser the Loom WiFi extender signal booster IP address or https://www.prowifiboost.com.
  • Explore it and register your new range extender and create an account.
  • Enter your mobile number or Email address in the Email field that’s shown on your desktop screen.
  • Create an admin account for the Loom range extender.
  • Enter in the text field your loom wifi extender password and also confirm it again.
  • After this, locket your device wireless network name from the presenting lists and go ahead.
  • Select your Loom WiFi range Extender SSID and type your existing router password.
  • This is now login with the correct method.

Hence, these are the Loom WiFi extender login steps. Use all the above-mentioned points to log in to your extender.

(ii) loom WiFi Extender Signal Booster with the app

Following are the steps mentioned for the loom WiFi extender signal booster login by the app.

  • Firstly, launch a Loom app on your internet-enabled device.
  • After this, open this app and finish the registration process of this signal booster.
  • If you already have an account, then, in this case, you just enter your account details in the login box.
  • Put the username in the Loom WiFi extender admin field.
  • In another field, enter the Loom WiFi extender default password.
  • Ensure that your entering details are correct.
  • Go ahead, and lastly click on the login option.
  • The Loom WiFi extender signal booster setup page is displayed on your desktop screen if it is correctly logging by you.

Why does the loom WiFi extender signal booster bring the user manual?

The Loom WiFi extender signal booster manual is most required to know the safety instructions regarding this range extender. You can’t operate your wireless range extender precisely without understanding this user manual instruction. You can get some of your querying answers through its user manual. These are some queries that are included under the Loom WiFi extender signal booster manual:

  • Does the loom WiFi extender support 2.4Ghz and the 5Ghz band technology?
  • How to reset the loom wifi extender?
  • How to configure the Loom WiF extender?
  • Is this Loom WiFi extender update?
  • Have an app for operating the loom Wireless range Extender?
  • What shows the Loom wifi extender lights?
  • Does the loom wireless extender provide the 2.4Ghz internet signal?
  • Why do we need to buy the Loom WiFi extender signal booster?
  • Does the loom Wifi extender signal booster cover up to 2640 sq. ft areas?

Therefore, you should understand the Loom WiFi Extender Signal Booster manual to know about this newest generation device.

What are the quick steps for the loom WiFi extender setup?

The loom wifi extender signal booster setup steps are almost dependable on the web interface. You have to do the following steps:

  • The foremost, use the web interface, either you can use the Loom WiFi extender app.
  • Once login in, you have to instantly get the setup page on your system desktop.
  • You should now finish the setup process of this device.
  • Follow the on-screen direction simply to modify the loom extender settings.
  • Make sure you may apply all the settings correctly.
  • In this manner, you simply click on the “change all settings or save” option.
  • Eventually, the loom WiFi extender setup steps are gracefully finished.

Which types of issues occur with the loom WiFi extender?

These are the loom WiFi extender issues, this is given below.

  • The loom wifi extender is not connecting.
  • Sometimes, this loom wifi extender has no internet connection.
  • The loom wifi extender is not working.
  • This loom wifi extender lights not flashing or blinking.
  • The web interface shows the Loom wifi extender password or username is incorrect.
  • Many times, the loom WiFi extender does not Support Alexa?
  • The loom Long Range Amplifier with Ethernet Port not working, etc.

Have any standard ways for the loom WiFi extender troubleshooting?

Here are the loom wifi extender troubleshooting tips, that are mentioned below.

  • Fundamentally, the loom wifi extender is not working due to an unstable connection of your router or misconfiguration. Resolves this device issue by using the reconfiguration method.
  • Another issue is represented by it, that is the loom wifi extender has no internet connection. You can simply resolve it by moving it to another location.
  • If the loom wifi extender is not connecting with your router internet. In this case, you just try again and ensure that it is connected now. If this is not connecting yet, then, you have another option, loom wifi extender factory reset.
  • If the loom WiFi extender does not Support Alexa, its specific reason is that your range extender does not connect with the router precisely. So, let’s connect it again and get rid of this occurring issue.
  • In this case, if the loom wifi extender lights are not flashing, then kindly reset your loom Wireless Internet Repeater in a precise manner.

loom WiFi Extender Signal Booster Review

If you are thinking about taking a new generation 2021 release Wireless Internet Repeater then, first of all, know about its all details. So, firstly check the loom wifi extender signal booster reviews through Amazon or any other platform. Here are amazing details that are named for this device review.

loom WiFi extender signal booster size and design

The Loom WiFi Extender Signal Booster is a booster that covers your router network range up to 2640sq.ft. It is the newest generation 2021 release Wireless Internet Repeater. The Long Range Amplifier brings with the Ethernet port connection. This Access Point works well, you can finish this device setup with the 1-Tap. The design of this system is mesmerizing and ingenious that supports Alexa & the 2.4Ghz frequency network connection. It is the best wifi extender to cover your home poor zones. The model number of this device is the LOOM2021.

Specifications of the loom WiFi extender

The Brand name of this device is the Loom and the network Range covered by this device is up to 2640 Feet. The Data Transfer Rate that’s provided by it, is 300 Megabytes Per Second. The Wireless Communication Standard connection and is compatible with the 802.11a/b/g/n, 802.11b, 802.11a.

Loom WiFi extender signal booster Dimensions LxWxH

The dimension of this wireless range extender is 3 x 2.5 x 2 inches and the weight of this device is 6.4 ounces. This is the first time it will be available in the market on April 11, 2021.

loom WiFi Extender Signal Booster price on Amazon

The Price of this wireless range extender is $39.99 and the ratings that are granted by the users is 7,907.