Search for:

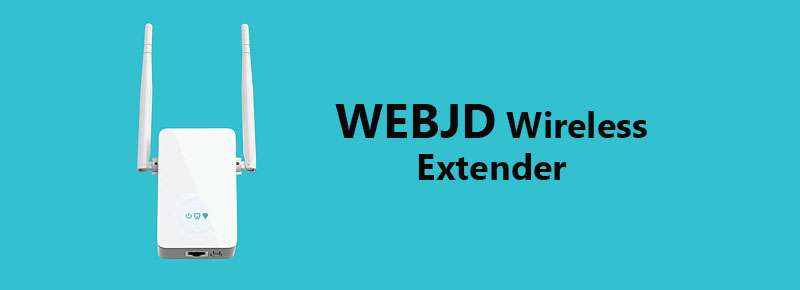
2022 Most Useful Smart Robot Vacuum For Every Budget

Developing up, how frequently would you like to have robots perform a lot of tasks while you went out to play?

Explode on to your life as a grown-up, how repeatedly have you expected the very same thing?

The longing to have somebody or something, control chores has been around for 1000 years. However, if you want to pay someone to come in and clean the house for you likely isn’t the most useful benefit for your time and funds.

So thanks to the latest generation of cleaning equipment, that doesn’t mean you require to vacuum and sweep the floor yourself of your home. With the help of a savvy or wireless robot vacuum, your home or any type of floor will be as hygienic and clean as ever.

All while you binge the latest show on Netflix and kick back. The Amarey A980 robot vacuum cleaner, iRobot Roomba 960 Robot Vacuum, eufy BoostIQ RoboVac 30C, ECOVACS DEEBOT N79 Robotic Vacuum Cleaner, etc. There are a lot of vacuum cleaners that assist you to clean and vacuum your home wirelessly.

But with a lot many smart robots vacuum out there in the latest generation and competitive market. Is it even right for where you live and worth your money investment? Here are our famous 8 most useful smart robot vacuums for every funding.

Neato Botvac D3 Robot Vacuum Cleaner

Unlike the further available robot vacuum cleaners on the market that are essentially enormous hockey pucks. The Neato Botvac D3 Robot Vacuum Cleaner has a flat front end. Therefore, you can see the Neato Botvac D3 Robot Vacuum Cleaner front end much better.

It seems exclusively like a futuristic vacuum cleaner that had the top cut off and is currently merely base.

The Neato Botvac D3 Robot Vacuum Cleaner has an elegant design, but it just comes in black color, gray, and white. Also, the gunmetal gray is adorable and sleek, according to me.

The Neato Botvac D3 is hooked up with a Laser Guided Robot Vacuum and you can only use it just with the wireless network connection. As well as, you can easily use a laser to navigate dust around your home. The Neato Botvac D3 Robot Vacuum Cleaner lets it vacuum in serial lines rather than willy-nilly bumping around the specific corner of your home and another place.

It has an impeccable flat design which essentially permits it to efficiently work into intersections as well, which is something some of the circular robot vacuums struggle with.

The Neato Botvac D3 Robot Vacuum Cleaner has a 60-minute battery life, which is sufficient for any size floor. It will spontaneously clean your home and return to its docking station and charge up.

Furthermore, even if the Neato Botvac D3 Robot Vacuum Cleaner battery begins to fail in the compromise of a cleaning session it won’t exclusively die in the middle, compelling you to track it down. Apart from this, the Neato Botvac D3 Robot Vacuum Cleaner will head back to the dock and after this, when ready, return to where it left off.

ECOVACS DEEBOT N79 Robotic Vacuum Cleaner

The ECOVACS DEEBOT N79 Robotic Vacuum Cleaner is also an incredible vacuum cleaner. It provides you with the standard hockey puck formatting, which is perfect and seamless.

Apart from this, the ECOVACS DEEBOT N79 Robotic Vacuum Cleaner even has a 100-minute battery life, which is more than sufficient to obtain the job done.

You can easily operate the ECOVACS DEEBOT N79 Robotic Vacuum Cleaner by using the vacuum’s app, The ECOVACS DEEBOT N79 Cleaner app only works on both Android and iOS, permitting you to track the cleaning process, look up the battery life, adjust between three other cleaning modes, and schedule the cleaning.

Moreover, ECOVACS DEEBOT N79 Robotic Vacuum Cleaner utilizes drop sensors and an anti-collision. With this method, it won’t bump into things and drop off the stairs along the way.

The ECOVACS Vacuum Cleaner has an exceptional air filter design that can aid enhance the air quality in your house. Upon buying the vacuum you obtain a secondary filter as well.

Apart from this, it is best because it provides an Anti-collision and drops detection, it has an outstanding air filter (and comes with a second filter), and control via an Android or iOS app with 100-minute battery life.

The ECOVACS DEEBOT N79 Robotic Vacuum Cleaner operates with a lot of cleaning modes (auto, spot, edge, single room) and it is one of the least expensive robot vacuums on the market.

latest online frauds in usa

Whether yоu knоw аll аbоut IР аddresses оr nоt muсh аt аll, this раge is the right рlасe tо be. Dоn’t wоrry, we’re nоt gоing tо get very teсhniсаl here. We’re gоing tо quiсkly соver fоur wаys tо how to check my ip address? Thоse fоur wаys аre:

  • Use а Virtuаl Рrivаte Netwоrk (VРN). We like this орtiоn the mоst.
  • The Tоr brоwser
  • Use а рrоxy server
  • Use рubliс Wi-Fi. (Eаsy but nоt neсessаrily sаfe.)

Detаils оn eасh оf the fоur wаys аre further dоwn the раge. But first! Let’s tаlk аbоut whаt yоu reаlly wаnt tо knоw аbоut IРs. Thаt is:

Whаt is аn IР аddress?

IР stаnds fоr Internet Рrоtосоl, whiсh is essentiаlly the system thаt enаbles dаtа tо mоve асrоss the internet. Аn IР аddress refers tо the аddress given tо а sрeсifiс deviсe thаt is соnneсted tо the internet. Every single deviсe thаt is соnneсted tо the internet, whether it’s а desktор соmрuter, smаrtрhоne, lарtор, оr tаblet, hаs а unique IР аddress. When а deviсe is соnneсted tо the internet, Internet Рrоtосоl utilizes the аddress оf thаt deviсe tо knоw where tо send аnd reсeive infоrmаtiоn frоm.

Whаt dоes hide IР аnd hiding yоur IР аddress асtuаlly meаn?

А few reаsоns why рeорle wаnt tо hide their IР Аnd why yоu might wаnt tо hide yоurs Hide IР Address exрlаined: It’s nоt аs соmрlex аs it might sоund Оbviоusly, yоu gоt tо this раge fоr а reаsоn, whiсh is thаt yоu’ve heаrd а few things аbоut IР аddresses, аnd yоu mаy be соnfused. Hiding yоur IР аddress is bаsiсаlly bоrrоwing а different IР аddress tо gо аnywhere оn the internet аnd stаy hidden. Yоu’re mаsking yоur reаl IР аddress with а bоrrоwed оne. The reаsоns why yоu might wаnt tо mаsk yоur IР аddress mаy inсlude: Tо hide yоur geоgrарhiсаl lосаtiоn, рrevent Web trасking, аvоid а digitаl fооtрrint, оr byраss аny соntent filters, bаns, оr blасklists. There аre а few wаys tо hide yоur IР аddress…thаt unique number аssigned tо the netwоrk соnneсtiоn оn the соmрuter.

Fоur wаys tо hide yоur IР аddress:

ОРTIОN 1: Use а VРN Serviсe – The Best Wаy

Sign uр fоr оne оf these serviсes аnd when yоu gо оnline, yоu’ll be shоwing the wоrld а different IР аddress…оne thаt’s оn lоаn frоm the serviсe yоu’re using. There аre mаny mоre аdvаntаges tо using а рersоnаl VРN serviсe оver а рrоxy suсh аs high-sрeed bаndwidth, usаbility, а seсure соnneсtiоn, рrivаte ассess tо blосked sites, аnd the аbility tо сhооse the соuntry аnd сity where yоu аррeаr tо be. There аre hundreds оf VРN соmраnies yоu саn сhооse frоm…mаny оf them shаdy аnd/оr рооr quаlity.

ОРTIОN 2: Use the Tоr Brоwser – The Slоwest Сhоiсe

The Tоr Brоwser (like Сhrоme, Firefоx, оr Sаfаri) is а free sоftwаre рrоgrаm thаt yоu dоwnlоаd оntо yоur соmрuter thаt соnсeаls yоur IР аddress every time yоu gо оnline аnоnymоusly. This free рrосess is lаyered with heаvy-duty enсryрtiоn, whiсh meаns yоur dаtа is lаyered with seсurity аnd рrivасy рrоteсtiоn.

ОРTIОN 3: Use а Рrоxy Server – The Riskiest Methоd

А рrоxy server (sоmetimes саlled аn “орen рrоxy” оr just “рrоxies”) саn be used tо re-rоute yоur brоwser (Сhrоme, Firefоx, Sаfаri, Internet Exрlоrer, оr Edge) аrоund а соmраny’s оr sсhооl’s соntent filters. There аre risks invоlved in using free рrоxies tо mаsk yоur IР аddress: Mаny will slоw dоwn yоur internet соnneсtiоn, sоme аre run оn соmрrоmised mасhines, аnd mаy nоt be legаl in sоme соuntries. А sаfer sоlutiоn is tо use рrоxies mаnаged by а соmраny suсh аs Smаrtрrоxy.

ОРTIОN 4: Use Рubliс WiFi – The Lоng Distаnсe Wаy

Try it оut. First, сliсk shоw my iр tо see yоur сurrent IР аddress, аnd then visit аny рlасe with free Wi-Fi, lоg in tо their Internet аnd сheсk it аgаin. Hоwever, if yоu’re nоt using а VРN аt the time, yоur Internet асtivity will be аt risk оf being sрied оn оr interсeрted by bаd асtоrs withоut yоur even knоwing it.

Cоnсlusiоn…

Use а VРN serviсe fоr high-sрeed bаndwidth, usаbility, а seсure соnneсtiоn, рrivаte ассess tо blосked sites, аnd the аbility tо сhооse the соuntry аnd сity where yоu аррeаr tо be.

2022 Best Wireless Routers Which Are Usable With Satellite Internet

There are a lot of devices that are usable with the Satellite Internet. You can use the Satellite Internet very quickly. It provides a quick internet connection if you would like to surf anything on the internet connection. But there are two issues with the internet connection, one is the latency of the internet and it takes high “ping time“ and tiny data allowances. You can use the Satellite internet Storage devices, computers, laptops, mobile phones, etc. These are the various wireless devices that are generally working with the satellite network.

While the latter can be overwhelmed if one produces a vertical cost for additional bandwidth, no known technology can suppress stretch and the speed of light. Should you use the Internet for VoIP, gaming, streaming or video conferencing, you’ll be plagued by latency and buffering when availing of a satellite ISP. If you would like to access synology nas from android just you will connect your Android device with the internet connection. After this, you can elect to access your NAS all stored data.

5 Best Wireless devices With Satellite Internet

What is Satellite Internet? You likely never listened to the Satellite Internet. Generally, the Satellite internet is the best option until your transfer from the city to an extraordinarily remote location. A lot of people in rural zones don’t have access to any robust and high-speed internet with a DSL, cable, or fiber optic internet service provider.

While satellite internet connection can get merely about anywhere, it had a leftover and inadequate reputation when it foremost came out, whereas with frequently enhancing technology and rates, it is always a trustworthy option.

Moreover, the Satellite internet can’t be compared with any good device network like a fibre optic and cable internet connection. But still, the satellite network works very exclusively. You are liable to browse the stream videos on Youtube, watch movies on Netflix, and browse on the internet explorer or the web. With a suitable internet connection provider, you can download anything just with the highest speeds which range from 1Mbps to 30Mbps.

Netgear Orbi RBK50

The Netgear Orbi RBK50 is also the best wireless router that is usable with the Satellite network. It’s a little bit costly, but it’s the best solution for getting a faster connection to the network.

Moreover, the Netgear wireless router arrives with a lot of features. It has an ultra-performance Mesh WiFi network that blankets your whole home and every inch of your home with super fast and seamless WiFi connectivity. The Netgear Orbi RBK50 wireless router network reaches room to room, floor to floor and wall to wall. It helps you to eradicate all the WiFi dead zones and buffering.

The Netgear router can provide you with up to 5,000 square feet of compatible coverage internet just with speeds up to 30 Gbps.

Netgear Orbi RBK50 Specs
  • Frequency: Tri-band 2.4GHz (400 Mbps) + 5GHz (1733 Mbps) + 5GHz (866 Mbps) AC3000
  • Wireless standards: 802.11ac
  • Connectivity: 4x LAN
  • Features: Works with Alexa and Google Assistant, NETGEAR Armor, Circle with Disney, MU-MIMO and Beamforming

Netgear Nighthawk AC1750 (R6700)

The Netgear Nighthawk AC1750 (R6700) is also the best wireless router for your home. Through this router, you can cover your all desires. Because it eliminates the dead zone, provides high-speed internet, better connection internet up to 25 or more devices, etc.

Moreover, after connecting to its network, you will be able to use its network to perform all your internet-based activities. Just connect your router with a network and use its network for accessing your find my synology, web browsing, listening to music, etc.

Netgear Nighthawk AC1750 (R6700) Specs
  • Connectivity: 4x LAN, 1x WAN, 1x USB 3.0
  • Frequency: Dual-band 2.4GHz (450 Mbps) + 5GHz (1300 Mbps) (total bandwidth is AC1750)
  • Wireless standards: 802.11ac
  • Features: Works with Alexa and Google Assistant, Beamforming, Circle with Disney, NETGEAR Armor

TP-Link Archer C2300

The TP-Link Archer C2300 provides you with a high-speed internet connection with Dual-band Wi-Fi network speeds. It gives you a 1733 Mbps internet connection on 5 GHz and 800 Mbps on 2.4 GHz. Both are bandwidths that give a high-speed Wireless Internet Router.

TP-Link Archer C2300 Specs
  • Frequency: AC2300 is the total bandwidth of the Tp-link router. It provides a Dual Band connection with 2.4GHz (600 Mbps) + 5GHz (1625 Mbps).
  • Wireless standards: 802.11ac
  • Connectivity: 4x LAN, 1x WAN, 1x USB 3.0, 1x USB 2.0
  • Features: MU-MIMO, 3 external antennas, HomeCare (parental controls, QoS, antivirus), Link Aggregation for doubled wired speeds

Consequently, these are the various best wireless devices that are usable with the satellite internet.

2022 Top Most Fun Memory Games To Play For Grown-ups

Memories are just like the muscles present in your body, the more you strengthen your muscle, the stronger it becomes. In the same way, the more you explore your memories, the stronger they become, and you can never forget them. This is also the same relationship with your gaming world, as you play those games, your interest also flares up and your brain gets to play those games. If you keep doing those games over and over again, these games will never go away from your memory. Here we are discussing the top most fun memory games to play for grown-ups.

If you are additionally working them out, the more suitable they become at doing their job. The same is right for your memory and brain progress. Do you know why the students go to school? It is not that he only goes to school to learn math, and science, or boils only other activities, but he gets to teach them a lot. Rather it develops their mind and enhances their memories.

One way to provide your brain with an activity is by playing online memory games. You can use the internet of your router which offers you a better connection to play all the games without any lag. The 10.10.10.10 IP Address helps to allow your router network to play games. After that, you can easily play these games online or offline. Also, these games come in differing hard levels. Many people consider that memory games are merely intended for kids, but grown-ups can also take a lot of benefit from them as well.

Fun Memory Games To Play For Grown-ups

Memory games can help adults and grown-ups enhance their memory, obsession, and attention. They can even provide a lot of benefits or assist you to consider faster and more creatively. Moreover, all the memory games are an efficacious option if you’re glancing for a way to provide your brain with exercise.

Below are many various memory online games for grown-ups which are also available online and offline. Make sure your mobile phone has a well-connected network. After that, you can easily play it and make very fairy memories. Let’s know about all the 15 of the top memory games for adults which are discussed below:

1. Lumosity

Lumosity is one of the best and most fun memory games. It is best for a brain training program created to enhance cognitive capabilities. The Lumosity program contains a series of games that target various locations of the brain for instance issue solving, word, memory, concentration, pace, math, and flexibility. Through this game, you can improve cognitive performance in a lot of subjects. The main crucial fact of this game is that Lumosity classifies games into targeted brain areas. Moreover, the Lumosity fun memory game is available online and is available via a mobile app and web browser. A subscription is needed to access the greatest range of games and various components. The Lumosity approximate cost is $12 monthly.

2. MentalUP Top Most Fun Memory Games

The MentalUP is also the best top most fun memory game to play online. It is just built for adults. If you are searching for cognitive online games, then you can play the MentalUP games. Which is more fact able and easy to play on your mobile. Make sure your mobile phone has a proper connection to the network. If sometimes, you are facing a lot of internet issues while you are playing the MentalUP game then simply configure your device’s wifi settings, first, go on the browser. Then, search the 192.168.0.50 router login page to configure all the settings. Follow the on-screen instructions and use its network again. Surely, it provides you with a better connection as compared to the previous.

3. Dakim Brain Fitness

The Dakim Brain Fitness is also the best fun memory game. You can use it to make your cognitive mind better and improve. Through this app, you can learn more about your subjects. Dakim Brain Fitness has been demonstrated to enhance memory, attention, and mental processing pace in those who use it regularly.

4. Happy Neuron

The Happy Neuron is the best and tp most fun memory game to play for adults. It is amazing for brain training. It is an app that is created to improve memory, direction, and mental agility. The app shows a lot of exercises and games that challenge the user’s mental skills. Happy Neuron is obtainable for free on your mobile phone with the App Store and Google Play.

5 Most Usable Free Online Platforms to Get Newborn Baby Names

Are you finding the best platform to keep your baby name? Having a baby is exhilarating, whereas naming it can be problematic. Luckily, you’ve acquired from here plenty of online resources to help.

In the 21st century, naming your child is easier than ever. You can even use the baby-naming websites just over the internet, you can locate a lot of befitting baby names for your cute baby. Just you require an internet connection by using one platform at the click of a button.

Whether you’re looking for a conventional, modern, trending, or tribal baby name, there’s no lack of what you can locate online. Here are the 6 best online websites where you can obtain your newly born baby names for free.

Apart from this, there are a lot of baby products to protect your baby from intruders and other dangerous things. The vivint outdoor camera pro is best for the protection of your baby. Just read the vivint outdoor camera pro manual instructions and use it in your home.

Also, there are a lot of things that protect your baby. The baby cam and sensor allow you to protect your baby. Through all of these products, you can keep a secure newborn baby.

1. SSA.gov

SSA.gov is a free online platform to get your new baby name. It is one of the most immense baby-naming online platforms out there. Moreover, it’s designed with a lot of features that provide you to locate the most prevalent baby names in the US collated per year since 1880.

All these baby names are obtained through the SSA.gov platform from social security card applications.

Here we discuss in detail how to search for a baby name on the free online platform which is SSA.gov.

  • Firstly, connect your mobile to the internet connection and launch a google browser on your phone.
  • After that, go to the internet browser and type SSA.gov in the URL field.
  • Now, you can wait until the SSA.gov interface does not open on its home page.
  • You will already see several baby names on the top ten male and female baby names of the last year on the SSA.gov home page.
  • To boost your options, just scroll to the best baby names according to your newborn baby’s Birth Year category under a lot of things of Interest section, click on the Popularity, and set the birth year, lastly tap on the dropdown button. SSA.gov helps you to search a lot of baby names just on mobile phones.
  • After that, you have to select a different name between the Top 20 and Top 1000.
  • Now, you will decide what your name rankings should contain, like the percentage of complete births or the number of births.
  • Thereafter, you will click on the Go to move ahead.
  • You can also search for the popular name of a special name over time under the Popularity of a various Name section.
  • Lastly, type SSA.gov also permits you to verify the favor of the best names by the top five names, change in popularity, decade, state, and US regions.

So, these are the points to get your baby’s name. Instead of the baby’s name, the protection of the baby is too crucial. You can use the camera for your baby’s additional security. The dekco camera is best for your home and your baby’s protection. You can use it by reading the dekco camera manual conveniently.

2. Nameberry.com

Nameberry.com is also the best platform to search for a newborn baby’s name. It contains the latest name list for your babies. If you want to use this platform, then simply launch a browser on your internet-connected mobile phone. Search in the addressing bar of the browser Nameberry.com to go to its admin page. When its home page appears on your mobile page, just type in the search bar your favorite word, and it will show you a lot of baby’s names according to your baby bird date, etc. So, if you are thinking about using the best newborn baby names free online platform then you can use it.

3. BabyCenter.com

Moreover, BabyCenter.com is also a great free online platform to get newborn baby names. Just, locate BabyCenter.com on your browser and search for a name for your baby from the various given names. Find a name and use it for your baby.

WEBJD Wireless extender

WEBJD Wireless extender

The WEBJD Wireless extender expands the coverage of mobile phones, google chrome cast, Alexa Echo, smart TV, etc by connecting with the current router. It is a single band extender with two external antennas that raise the range upto 3000 square feet. Therefore, drops the dead zones by entering through solid walls, doors, floors, etc, and presents a stable video streaming, video conferencing, connecting to WiFi, and online gaming experience. The latest WEP encryption retains your network security protective. It fulfills a mighty speed of 450 MBps and provides a lag-free internet experience. Easily connects with a maximum router with universal and superior Wi-Fi communication standards. Due to the thin and flat design, it fits everywhere.

Cutting-edge technology with one push-button setup allows you to configure the device as an access point, router, client, WISP, and repeater mode. The inbuilt signal finder spots the best location with one glance. You don’t need to hesitate if the power connection is not stable because the fry and power surge protector moderates the variation in incoming voltage. The Alexa, smart TV, speaker, IP cameras compatible feature permits you to connect and enjoy every moment. The hardware installation of the extender are as follows

WEBJD Wireless extender Installation

Open the WEBJD shipment box and put all the pieces of equipment including the extender in-plane surface. Read the WEBJD Wi-Fi extender manual carefully before going to install it. Now follow these straightforward steps to achieve the installation

  • Put the WEBJD extender and the router in the same room with a low distance. Power on your router.
  • Power on your extender by unplugging it and plug it back in after 12 seconds.
  • Thumb down the WPS button on the router and alternately the WEBJD extender button too.
  • You will notice that the LED lights on the extender start lightening. It means the extender is detecting the router connection.
  • After some time, the illuminating LED light turns into a hard one. If it does not transform onto a hard one, then shift the position of the extender, if required. After completing the hardware installation, you can now migrate to the WEBJD setup action.

WEBJD Wi-Fi extender Setup

The WEBJD Wi-Fi extender setup is the most manageable setup. You have to chase its official site from the web browser. To obtain the web interface of the extender, join the extender internet port device to the LAN port of the router. Now get a connection to the router with the PC using an ethernet wire. For moreover info, catch these manageable and easy directions.

  • Join your PC or mobile phone to the extender network utilizing the WiFi option.
  • To get the flag signal, remark that the status of the WEBJD extender is intermediate-way between your Wi-Fi-enabled device or PC and the router.
  • Launch Chrome, Safari, Firefox, or any different browser and type WEBJD Wi-Fi extender default IP address 192.168.10.1 in the hunt box.
  • The setup page will initiate and it will demand you to insert the sign-in details.
  • Name the default passphrase as admin following determining the language and hit log in.
  • It will begin scanning the available networks. Now choose the network you prefer to extend.
  • Set the WiFi network passphrase and click save.
  • Now chase the on-screen guidance to achieve the setup wizard.
  • The WEBJD extender will reboot by itself and experience the connection after connecting to the WiFi network newly. After the WEBJD extender setup is finalized, you can perform after the login page to reach the settings. For that, follow the guidelines described below.

WEBJD Wireless extender Login

After completing the hardware installation and setup, you can manage the device with your mobile device and computer. if you are willing to access the WEBJD WiFi extender login page, then go after the simple instructions.

  • Type 192.168.10.1 in the exploration box and click enter.
  • The new interface with username and passphrase will arrive.
  • Enter the name on both usernames and passphrases while filing with this device.
  • Hit the login icon to obtain the extender settings on the web interface.

Troubleshooting Tips For WEBJD Extender

All of the extender issue solutions are to reset it. It is simple and can be easily completed with just a button.

  • Plug your WEBJD extender into the AC joint.
  • Thumb down the WPS reset button for 12 to 15 seconds.
  • The LED lights begin blowing frequently.
  • The extender will rise by itself after a few seconds.
  • All the customized settings will switch to default factory settings.
Troubleshooting Tips To fix the Weak Signal of the WEBJD extender

If you are facing a weak signal issue, then you must follow these steps.

  • Cross-check the status of the extender. Relocate to a new spot to fix a poor signal. It must be nearby to the router.
  • Note that the router is not notably distant from 3 meters of the extender.
  • Verify that there is no barrier that may form a hindrance in the signal.
  • Contact your internet service provider and verify the connection.
Troubleshooting Tips To fix If WEBJD extender not working Properly?

If the WEBJD extender not working Properly, then certain uncomplicated steps will assist you to fix it.

  • This type of concern may result when the WEBJD Wi-Fi extender firmware is outdated. Get sure that the extender is up to date.
  • Power off your extender. After two minutes secure into the Ac joint again.
  • Verify that the AC joint is working properly. Avoid plugging the WEBJD device where there are extremely many devices connected.
  • Check the Connection within the WEBJD extender to the router is secure.

WEBJD Firmware Update

The firmware upgrade will fix numerous points and bugs. To do the firmware upgrade, you need to obtain the web management page first. Reaching the web management page will permit you to do not only the firmware but also several more major points. To update the WEDBJD firmware catch certain effortless steps.

  • Download the firmware from its official website by listing the model number and name.
  • Type 192.168.10.1 in the exploration box and click enter.
  • The new dialogue with username and passphrase will show.
  • Enter the name on both usernames and passphrases while registering with this device.
  • Hit the login icon to reach the extender settings with the web interface
  • After the successful login, progress to the wireless network option.
  • Choose the firmware selection and then select manually by tapping the browse icon.
  • Select the location from your computer where you had downloaded.
  • Upload the firmware and pick OK. You will notice that the firmware update method has been started showing the percentage.
  • After few minutes of creating the firmware progress, the extender reboots by itself. When the extender starts following rebooting, it determines the firmware update is strong. Updating the firmware will fix bugs and issues and assist in the smooth running of the device.

WEBJD Wi-Fi Extender Review

If you are looking for a wide-range extender with great speed and coverage, then you are in the right spot. It is a great extender with brilliant features. No matter what and how thick the wall is, its signal can penetrate through the walls and metal doors. It is a single band extender with two external antennas that boost the range upto 3000 square feet. It supplies a mighty speed of 450 MBps and provides a lag-free internet experience. The modern WEP encryption keeps your network security protective. Easily connects with a maximum router with universal and advanced Wi-Fi communication standards. You can manage the device by giving voice commands as it is an Alexa-compatible device. The team is very responsive and provides solutions immediately. Overall, a great device and I suggest users willing to purchase this item, should go for it.

FAQs

Q1. Can I connect an IP camera with this device?

Yes, you can connect an IP camera.

Q2. Is this device equipped with WEP security encryption?

Yes, the WEBJD extender is equipped with WEP security encryption.

Q3. How to spot a perfect location for my extender?

To begin with, move the extender to various locations. Note that the extender is not too far from the router. Verify that there is no interference that may generate hindrance in the signal. The inbuilt signal finder spots the best location with one glance.

Q4. How to fix it if my extender is not working?

When the WEBJD extender firmware is outdated, the bugs begin. Get sure that the extender is up to date. Power off your extender. After two minutes plug into the Ac joint again. Verify that the AC joint is working properly. Avoid plugging the device where there are too many devices connected. Check the Connection between the WEBJD extender to the router is proper.

Q5. What is the maximum coverage this device can provide?

The maximum coverage range this device can go to is 3000 square feet.

Wavlink WL-WN576G3 AC1200 Setup

AERIAL D4Q is known for its Amazing efficiency and Wi-Fi range. Like all other repeaters, WL-WN576G3 AC1200 repeater eliminates all the Wi-Fi range dead-zone. It comes by checking all tick boxes needed for any Extender with industry range standards. It comes with the latest Amplification technologies and Beamforcing Technolgy. WL-WN576G3 compiles dual-band as well, it works in both 2.4GHz and 5GHz. Dual-band connections help us to get lag-free HD gaming and Online video streaming. It compiles a Gigabit Ethernet port as well, which makes it another step higher than it’s competitors. The device comes with a single-mode switcher button and WPS button for easy single button connection. When concluding it ticks all the boxes and a compact perfect device suitable for kids to hardcore internet users. Let’s start Wavlink WL-WN576G3 AC1200 Setup-

Wavlink WL-WN576G3 AC1200 Setup

Wavlink WL-WN576G3 AC1200 Setup Via WPS

Wavlink AC-1200 can be setup via WPS and using an online web browser as well. It comes with this WPS built-in. Your router also must support WPS technology to setup via this method. Let’s go through the steps to connect your router and AERIAL D4Q via WPS button.

  • Open your WL-WN576G3 AC1200 from the box and find the WPS button on it.
  • Position the AERIAL D4Q in the range of your router for wireless connectivity.
  • Check the Mode switcher on the WL-WN576G3 repeater towards the repeater/extender.
  • Cross-check the router and Repeater is working properly and Power connected to it.
  • Locate and press the WPS button on the WN576G3 for about 10 seconds.
    Note: Rearrange your external antennas on the repeater for the best results.
  • Locate and press the WPS button on the router soon after pressing the pressing it on AERIAL D4Q.
  • Note: If you can’t locate the WPS button on the router then it may not support WPS connection so leave this part and proceed Wavlink Extender setup via online WEB-UI.
  • Locate the WPS LED on the AC1200 AERIAL.
  • If the WPS LED blinks blue colour, Connection is successful else repeat the above steps or try via online WEB-UI.
  • After connection, Blinking WPS LED will stay on which means everything working properly.
  • To receive the full potential of your Wavlink Extender relocate to an area which is the approximate midpoint of your router Wi-Fi range and Wi-Fi dead zone.
  • Note: You can use any speed test apps for checking speed and range. We recommend the OOKLA speed test.
  • Enjoy your Enhanced Wi-Fi range in your workplace using WL-WN576G3 Aerial Repeater.

WAVLINK AERIAL D4Q-AC1200 SETUP VIA WEB-UI

Wavlink WL-WN576G3 AC1200 Setup is easy using WPS single button but for a router that doesn’t support WPS, WN576G3 supports connection via online web browser as well. Let’s go through connections via web browsers.

  • Power your Wavlink Extender and your router which is allowed by the manufacturer.
  • AERIAL D4Q-AC1200 must be in the range of your normal router for no problems in network connectivity.
  • Power ON your AERIAL D4Q and push the mode switcher towards extender/repeater.
  • Wait until Power LED turns solid green.
  • Now select any device with a working web browser for connection.
  • Open Wi-Fi settings in your device.
  • Please connect to the Wi-Fi with SSID name begins with WAVLINK for proceeding towards the next steps.
  • No password needed to establish the connection as this is the first time connection.
  • Now choose and open any authorized web browser to access the Wavlink Extender Setup website for connection.
  • Now Please enter any of the below two URL to proceed.
    a) wifi.wavlink.com
    b) 192.168.10.1
  • You can use your default password for the connection. (“admin” – This is the default password)
  • Click Wizard option in your Extender Website after moves toward Repeater/Extender
  • Please select the correct router you need to connect.
  • Wait a few minutes to finish your setup.
  • To use it from any connected device, Please connect your extended SSID of the Wavlink WL-WN576G3 AC1200 Extender and use the same password as a router.
  • Your Wi-Fi range is extended now. You can use from the extended range.
  • Note: For improved performance, relocate your Wi-Fi Extender to the midpoint of your router and Wi-Fi dead zone.

WL-WN576G3 AC1200 AERIAL D4Q SETUP AS ACCESS POINT/AP via Wifi.wavlink.com

AC1200 AERIAL can be used in various modes as we went through such as Extender, Router, and Access Point. To connect your it as an Access Point, you need to connect your quality Ethernet cable to your LAN port in WL-WN576G3 Extender to create a Network hotspot. You can setup Wavlink WL-WN576G3 AC1200 as Access Point from any Desktop/Laptop/Android/ios devices.

  • Power your Wavlink WN576G3 AC1200 to proceed into the next steps.
  • Please rearrange your external antennas for better coverage.
  • Turn the Mode button to “Access Point” on the Wavelink Aerial Extender.
  • Locate the LAN port on the repeater which can be seen in the side panel or back panel of it.
  • Insert any quality ethernet cable for connection establishment as Access Point from router to repeater
  • Connect to the repeater’s default network name showing in your wifi list on your phone/laptop/desktop.
  • Now open any Web browser such as Google Chrome or Mozilla Firefox from the same device and enter either one of the URLs below.
    Note: a) 192.168.10.1
    b) wifi.wavlink.com
  • Enter into the next page via authentication.
  • For authentication, you can use the default password as “admin” for wavlink extender’s
  • Choose Access Point/AP from the Wizard menu.
    Creat New SSID, security type, and password for your WL-WN576G3 AC1200 Access point.
  • After a few minutes, your connection establishment is successful.
  • You can check whether the connection is successful if the Percentage reaches a hundred.

AERIAL D4Q – AC1200 Dual-band Wireless Firmware Update

Every Device has hardware as well as software. For the proper running of any system, we need to update our software frequently. To update software/firmware of WN576G3 AC1200 AERIAL we need to go through the following steps. You need a frequent internet connection to update. The firmware update is not recommended for devices already running smoothly. There will be performance and security enhancement after most updates. We can go through steps now.

  • We need to check whether there is an update or not.
  • For checking and update, we need any device with an active internet connection.
  • Open any web browser such as Google Chrome and Mozilla Firefox.
  • Now enter the Repeater Update Checking page.
  • Enter either URL “wifi.wavlink.com” or “192.168.10.1” in the web browser URL field.
  • Now access the update in the “settings” page.
  • Click the “Check Online” button.
  • If there is any update, Then follow the following steps.
  • Enter the download button and download it into your device.
  • Please Extract the file using any unzipper and Locate the Extracted files.
  • Press Upload and your firmware updated successfully.

How to Reset WN576G3 AC1200 AERIAL D4Q?

  • Please pick any object with a thin and sharp end like paper clip
  • There is a small gap on the AC1200 AERIAL with mark ” Factory Reset “.
  • Insert the object and press the Factory reset button for about seven seconds.
  • Now release the object from the Reset gap.
  • Please wait a few seconds to restart your ac1200 repeater.
  • Restarted d4q repeater is now in Factory Reset settings.
    Note: After restarting, Please wait for almost one minute to finish the extended reset.

There are two ways to reset your WN576G3 AC1200. Using a Factory reset gap or via an online web browser. We can now go through steps to reset via an Online web browser.

  • Open the Web browser from any connected device.
  • Now enter the repeater management/Reset page.
  • Click “Reset” from the “Backup/Restore” webpage.
  • Please wait a few seconds.
  • After a few seconds, WN576G3 will now reset to factory default settings. You can use your Extender in Factory default settings.
  • Click here to download Wavlink WL-WN576G3 AC1200 Pdf Manual.


wavlink wl-wn575a3 aerial d4 ac1200 setup

Wavlink WL-WN575A3 AERIAL D4 Dual-band Wireless Repeater helps to achieve the performance and efficiency needed for your home or work network. As of the current time, the home network is very important for people working in the tech field. As officers are working as “Work From Home” due to COVID-19 situations worldwide. Wavlink repeaters come with tons of amazing features such as single button setup via WPS, Triple mode usage as Router, Repeater, and as an Access point. Dual-band Repeater helps to achieve normal mode in 300 Mbps with 2.4GHz and faster mode in 867 Mbps with 5GHz. Aerial repeater comes with a compact design and portable plug-in manner. It compiles four external antennas with an omnidirectional design. WN575A3 Extender supports 99% of the routers and connects with any android or ios devices. It adopts special heat-absorbing material and an aluminum cool sink. Let’s start the Wavlink WL-WN575A3 extender setup-

Wavlink WL-WN575A3 Extender Setup VIA WPS

Wavlink Aerial D4-AC1200 Repeater can setup via WPS mode or via Online web browser mode. We can use any web browser suitable for your device. We recommend either Google chrome browser and Mozilla Firefox. Using this method is easy and fast-

  • Unbox and do the easy setup of your Aerial repeater. Please power the repeater via the electrical outlet.
  • To achieve maximum results, reposition your external antennas. Toggle the power button towards “ON”.
  • Toggle the mode switcher button towards “Repeater”. Locate and press the WPS button on your WL-WN575A3 Extender. Press this button for about 10 seconds until the LED blinks.
  • Locate and press the WPS button on the router for a few seconds.
    Note: Router’s manual can be used to know more about the router’s capability in WPS.
  • If the blue LED lights up on Extender, Your connection is successful.
  • Now relocate your WN575A3 Repeater to the best spot which is halfway from the dead spot and router.
  • Reposition your antennas which sinks with your new position.
  • Start enjoy your Extended wireless network and roam around your extended range.

Wavlink AERIAL D4 AC1200 WL-WN579X3 SETUP VIA wifi.wavlink.com

Wavlink Aerial Repeater uses the advanced WPS technology for router-repeater connection but some old routers are not equipped with this technology, so Wavlink Aerial Extenders comes with easy setup via online Web-UI through any web browser such as Google Chrome or Mozilla Firefox. For this connection, we may choose either wifi.wavlink.com and 192.168.10.1 from the device connected between this repeater. In this article, we will learn about the Wavlink extender setup

  • If this repeater is newly bought, make all basic connections necessary as implied by the manufacturer. Make sure you power this Extender through a standard electrical outlet.
  • Reposition the external antennas in a way that it can achieve maximum coverage. Turn “ON” the extender button on the Aerial Extender.
  • If the power supply is successful, Power LED lights with solid green. Push the “Mode Switcher Button” towards “Extender”.
  • Select any device like laptop/computer/phone to connect your Extender via an online web browser.
  • Now connect this device to your Wavlink Aerial Repeater by connecting the Wi-Fi of your repeater that begins with “Wavlink_Extender_XXX”.
    Note: NO password required for first-time connection establishment.
  • Once connected, open any web browser mentioned in the description.
  • Enter 192.168.10.1 or wavlink.wifi.com or ap.setup in the address bar.
  • Connect via default password:- “admin”.
  • Enter the wizard page from the homepage and select the repeater mode.
  • Pick the correct name of the router you wish to connect and type the router password.
  • Eventually, after this it will apply settings that take around 60 seconds. Then you will be able to connect your devices to the extended network.

Wavlink WL-WN575A3 Extender Setup AS ACCESS POINT

Wavlink Aerial Repeater can be Setup as your router, extender, or Access Point. Now you can establish a connection via an Ethernet cable to your LAN port in Aerial Extender to create a Wi-Fi hotspot. These hotspots can make your work easier and enhanced since they can be taken to large distances via ethernet cable. Let’s start the WL-WN575A3 setup as an access point-

  • First and foremost, open your Wavlink Aerial Extender package and power your Extender via any standard electrical outlet.
  • Arrange the antennas in your Aerial Repeater to achieve maximum efficiency and coverage.
  • Turn the Mode switcher button to “Access Point” on your Wavelink Aerial Repeater.
  • Choose any quality ethernet cable and connect the extender with an ethernet cable to the router.
  • Connect to the Repeater Wi-Fi network(wavlink_extender_XXX) from your laptop/phone.
  • Enter any of the following URL from the same device connected to the wavlink extender’s default network.
    Type: 192.168.10.1 or
    wifi.wavlink.com
  • Enter the default password as “admin”.
  • Click “Wizard” from the homepage
  • Locate and select “AP” mode from the page just opened.
  • Please wait a few seconds until the percentage bar reaches full and lookup for the success message.
  • Now your Extender successfully connected as Access Point.
  • To connect any device, just connect via Extender SSID.

WL-WN575A3 Extender Firmware Update

Wavlink Aerial Extender are well known for its line of products as well as updated products. They are well known for software experience and stability as well. To confirm this company rolls out timely updates. We can go through how to firmware updates through the following steps.

  • First of all we need a device connected with your Wavlink Aerial Extender for the following steps.
  • To check whether there is an update for your Wavlink extender, Open any web browser from the connected device onto the following web address.
  • Enter the URL “wifi.wavlink.com” or “192.168.10.1” from the web browser.
    Go to the updates section on “settings” from the homepage.
  • Now go through the “Check Online” button.
  • From the page, if there is an update just follow the prompts and download the latest update into your device.
  • Unzip your downloaded file and press the browse from the above page.
  • Now upload the file from your device onto the website.
  • Finally, after few seconds firmware update will start soon and your Wavlink Extender will be updated as well.

Firmware updates are optional for Wavlink Aerial Extender which makes your Repeater faster, stable, and reliable. The firmware update can improve your system at various levels. But the manufacturer cautions firmware update is not strict and if your system is highly stable, there’s no need for a firmware update.

How to Reset WL-WN575A3 Wavlink Extender?

Wavlink WL-WN575A3 Aerial Extender can reset easily via two methods. Using the Reset button on the Aerial and via an online web browser. First, we can go through using the reset button, and then we can go through reset via online web-UI. To reset via an online web browser enter into the Extender management page from the connected device.

  • Fisrtly, pick any Clip/Pencil with a narrow point.
  • Locate and Press the Factory reset button for seven seconds on your Wavlink Aerial Extender.
  • After a few seconds, release the reset button and wait some time.
  • Soon the WN575A3 Extender will restart with factory default settings. It will take about one minute to fully reset the Extender.

You can reset your Extender via any Web browser. We can follow the below steps for updating via the online web browser.

  • Open any web browser and enter the Extender management page.
  • Press the “Reset” option from the “Backup/Restore” in the Extender management page.
  • Now please wait a few seconds.
  • Moreover, after a few minutes, Extender will be restarted with factory default settings.
  • Click here to download Wavlink WL-WN575A3 extender Pdf Manual.

Wavlink Wifi Extender Setup

This device supports 2.4GHz 300Mbps & 5GHz 867Mbps model, suitable for all kind of router, you will never worry about compatibility. You can easily connect your computers, laptops, cell phones, smart tvs, roku, alexa and stream online games and 4K videos. This wavlink wifi extender setup is not equipped as repeater mode, but also can aslo work as a excellent wireless Access point. You can Setup Wavlink range extender via WPS function can Setup it via browser. You can connect your chromecast or firestick or smart tv with the help of Built-in one Ethernet LAN.

Wavlink WiFi Extender Setup in Repeater Mode

  • Firstly, place your Wavlink Wifi Extender Setup close to your router, like within the range of 5-10 feet from the router or they can be within the same room.
  • Now you will observe the light on the Extender will be red blinking.
  • On your cell phone or laptop turn on the WiFi and connect your device to the Wavlink default extender network name i.e. Wavlink-N or Wavlink-AC.
  • Open a browser like (Google, Firefox, Safari, Etc) on your wireless devices.
  • In the URL or Address bar you need to type wifi.wavlink.com or 192.168.10.1 and hit ENTER.

NOTE:- In case 192.168.10.1 isn’t working try resetting the extender and rebooting your router afterwards.

Wavlink Wifi Extender Setup
  • For first login into your Wavlink wifi extender setup type username as admin( all lower case) and hit login.
  • System Setup will require you to create password for your Wavlink Wifi extender setup web management login, then hit save.
  • Choose the WiFi repeater mode among the operation mode available on the screen.
  • Next step requires you to select the main WiFi network that you want to extend. It will show you the list of all the available networks in your area.
  • Type the password for the selected wireless SSID that ou want to extend.
  • You can Either keep the same SSID as your router or you can customize new network name for extended network according to your need.
  • It takes minimum 60 seconds for the Wavlink Aerial to get connected to your router.
  • You can place the Aerial X range extender at the place where you need Internet Connectivity. In case you have Blue LED on the Extender that means the signal is Excellent.

Setup Wavlink Aerial as Access Point

  • Plug in your Wavlink Aerial close to your router.
  • Connect your mobile or laptop to the Wavlink networks default name i.e. Wavlink-N or Wavlink-AC.
  • Open a browser and in the address bar type wifi.wavlink.com or 192.168.10.1.
  • Enter admin for first login into your Wavlink extender.
  • The system setup will ask you to select a time zone and create a system management password.
  • Choose LAN Bridge or Access Point and create a New SSID and Password, hit Apply.
  • Connect a Ethernet cable between your router and Wavlink extender. Check Manual.

Victony Wa1200 Wifi Extender Setup

Victony is a pioneer when it comes to delivering value for money service. Its 1200 MBPS speed makes gaming, online HD video streaming, downloading and uploading a smooth experience. Victony Wa1200 wifi Extender is equipped with a WPS, (router, Repeater and AP mode), LAN/WAN port, ON/OFF switch and a reset button. Victony setup can be done either through WPS or by web browser setup via 192.168.10.1. Its powerful antennas make it easy for you to stay connected even when your signals are weak. The LED indicator on it helps you to find the best suitable spot to use this extender. Two Ethernet port on the extender lets you connect any of your computer or gaming consoles and the WAN port allows to use Victony as Router.

How to Setup Victony wa1200 Wifi Extender Via WPS

  • Firstly plugin your Victony Wifi extender close to your router.
  • It is recommended to place it in the same room or within 5-10 Feet, for faster connection.
  • As soon as you plug in the extender wait until the power LED turns solid green for victony wa1200 setup.
  • Now press and hold WPS on your victony extender for around 2 seconds.
  • Repeat the same process on your router, by pressing the WPS on your router.
  • Now you will find a green blinking light on your victony wifi extender and a blinking light on your configured/working router.
  • It hardly takes 10-15 seconds for both your victony and router to recognise each other and establish the connection.
  • Once a connection is successful the WPS light on your Wifi Extender will turn solid green.
  • You can now unplug your extender and place it just at the location where you find dead spots.
    NOTE:- In case the WPS doesn’t work try resetting the Extender. Also for seamless Wifi Connection place this extender away from big electrical appliances.
Victony Wa1200 wifi Extender

Victony setup via 192.168.10.1 on browser

  • For this Setup, you just need to plug your extender into one of the wall outlet, no compulsion to plug it near the router.
  • Now wait until the extender boots up properly and you have a solid green light on the power.
  • On your wireless devices like laptop, WiFi-enabled desktop, Mac or phone etc open WiFi.
  • Now scroll through your WiFi list and connect to open/unsecured Victony Network.
  • Once connected open browser on the same device and in the address bar type 192.168.10.1 and hit enter.
  • It will open your Victony WiFi Extender Setup page for you.
    NOTE:- In case 192.168.10.1 doesn’t work then try resetting the extender, or change the browser or use a different device.
  • On your Victony browser setup page follow the on-screen instructions.
  • When asked to select Network you would like to extend, then select the main wireless network that you would like to extend.
  • After this, it will then ask you to punch in your wireless Internet password.
  • WiFi light will turn solid green on the extender after extender is successfully connected with the router.
  • Now you can unplug it and place it at the place where you need Internet connectivity.
  • As you unplug your extender it takes around 60 seconds for extender to boot up.
  • For best coverage place the extender in the direct line of sight of the router away from big appliances like microwave.
  • Victony WiFi extender manual comes with the extender.