How to Setup Krevi Wifi Extender 5G 1200mbps Dual Band Signal Booster
If you have just bought krevi wifi range extender and you are having hard time setting it up then need not to worry. In this article today we will give you step by step guide on how to setup krevi 5g wifi booster in just few minutes. Before we start the process make sure you have working internet on your router plus your router should be broadcasting the wifi.
Also plug the krevi extender in the same room as your router. Now, once you have solid power led on the extender than we can start the setup process. So we can set it up via two methods, first is wps and second is via browser. Moreover, range extender, wifi booster and wifi repeater are all the same thing. So, if in this article if we use any of the three names then don’t get confused, it means the same thing.
So first and foremost lets learn the easier method that is wps setup
Krevi Extender Setup Via WPS
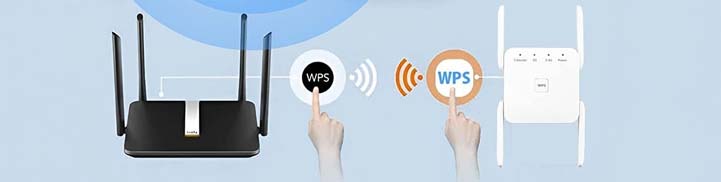
- Locate the wps button on your router. You will need to press and hold it for around 2 seconds. Now, you will get a blinking light on the router.
- Within 2 minutes press the wps button on your krevi extender. As you do it you will see a blinking light on the extender.
- Your router and extender will blink for around 2 mins or less than that. After successful wps setup your wifi light on the krevi wifi booster will turn solid.
- Moreover, if it doesn’t then the wifi light on the krevi will not turn solid.
- With Successful setup you will get your extender network showing up in your wifi list. It will come up with “Pro” suffix along with your wifi network name. For example if your router’s wifi name is “mikefamily” then extender network will come up as “mikefamily-pro-2.4g”.
- So, you can now grab your phone or computer and go to its settings or wifi list and there connect to the network ending with “pro” suffix. You will need to type the same password as your router to connect to it.
- Also, you can now unplug the extender and place it at newer location where you need wifi connectivity. It is recommended to place the wifi booster halfway between your router and the location with poor wifi connectivity.
Now lets learn the second method to setup krevi wifi booster. You can try this method if the above mentioned wps setup doesn’t work for you.
Configure Krevi wifi booster via browser
- First and foremost make sure both your router and extender are plugged in the same room.
- Also the power LED on the wifi booster should be stable, wait until you have solid green power led on it.
- Now, you can use your computer or cell phone to setup the extender. So, goto its settings and then to wifi, there you will see “Wifi-Repeater-2.4-XXX” network name. This is your extender. Connect to it.
- As soon as you do that the krevi extender login window will pop-up automatically. In case it doesn’t than need not to worry. Open a browser on the very same device and in the url or address bar type “192.168.188.1” and hit enter. This will take you to the setup page.
- Next you will need to select mode if asked. So, there you simply just need to select ‘repeater mode’ among the other options.
- Later on it will show you the list of all the available networks in your area. You just simply need to select your router’s wifi name among the list and type its password for the confirmation.
- Choose ‘save settings’ next. As you do that your wifi repeater will take about 60 seconds to configure with your router. Also, your repeater network name will come up in your wifi list as your homenetworkname and then with “Pro” suffix in the end.
- You can later connect your phones, computers, smart tv’s, security camera’s to this extenders network name.
- Moreover, you can now unplug the extender and plug it at your desired location. We recommend you to place the extender in around 30-40 feet of radius from the router. It gives best signals when in direct line of sight of the router.
When and How To Reset Krevi Wifi Extender?
It is really important to understand how and when to reset and wifi extender. Because whenever you change your wiif name, or you change your wifi router, or even if you change password on your router then you will have to reset the extender too. Most of the people face this issue. So, in this article today we will tell you how to reset krevi wifi extender in just 10 seconds.
- First and foremost plug your krevi extender into a wall outlet and wait for atleast 60 seconds until its power led turns stable or solid.
- Next, find a “reset button” or “wps/reset” button or “wps” button on your extender. You will need to press and hold that button for around 10 seconds while the extender is still plugged in to the wall.
- You can release the button after 10 seconds and then wait for around 60 seconds.
- After 60 seconds you will see a extender’s network name showing up in your wifi list. It will come up as “WifiRepeater-2.4G” or “Wifi-XXX”. You can connect to this wifi name and set it up again.
How to connect phone, smart tv, gaming console to the Krevi wiif booster?
You can connect your any smart device to the extender’s network name. First of all make sure your extender is all setup. We have already mentioned the steps above on how to setup krevi. Afterwards it will show up in your wifi list as your home network name and then with “Pro” suffix.
So, lets suppose of you need to connect your smart tv to the krevi extender, then goto the settings and then to networks on your smart tv and then scan for available networks. Next, select your extenders network name and type its password for the confirmation. By default extender uses the same password as your wifi router’s password.
In the same way you can connect phone too. Goto the settings and then to wifi list on your phone. Next, search for wifi network and then select your extender’s network name among the list. Type its password and voila! You are now using extender’s wifi.
So, this is how you can use krevi extender wifi with your different gadgets.